
If you’re here, you’re probably planning or looking to plan your very own trip to Havasupai. Making the trek into Havasupai is a long 10-mile hike followed by four days of living with minimal resources and service and another long 10-mile hike back. To be candid, I’m not an outdoor enthusiast or avid adventurer. My idea of an ideal trip is more like a luxury hotel with indoor plumbing, minimal walking unless I’m shopping, and fine dining that doesn’t consist of dehydrated food. However, backpacking Havasupai was a bucket list trip, a one-and-done for me. But if you do it right, I think once is enough. This is why I’m sharing the ultimate Havasupai guide covering the permit process, packing list, a full 4-day itinerary, recommendations from experience, photography tips, and more!
Hopefully, this Havasupai guide will cover everything you need to know for a successful trip. If I missed something or you have further questions, leave them in the comments, and I’ll do my best to answer them!
Best Time to Visit Havasupai
I don’t think there’s a perfect time to visit, and I’d go whenever possible based on how competitive permits are (elaborate on the permit process below). But for reference, summers are hot in Arizona, so it’s not ideal for hiking, but I can only imagine how refreshing swimming would be. Just know that trails into Supai will close if the temperature exceeds 115°F, and flash floods are more likely in the summer. Alternatively, going in the spring or fall means better hiking weather, but the water might be cold for swimming. We went in early May, and Brett thought it was the perfect mix of being cool outside yet warm enough to swim while I still found it too chilly to get in the water, so it’s a personal preference.

Permit Process
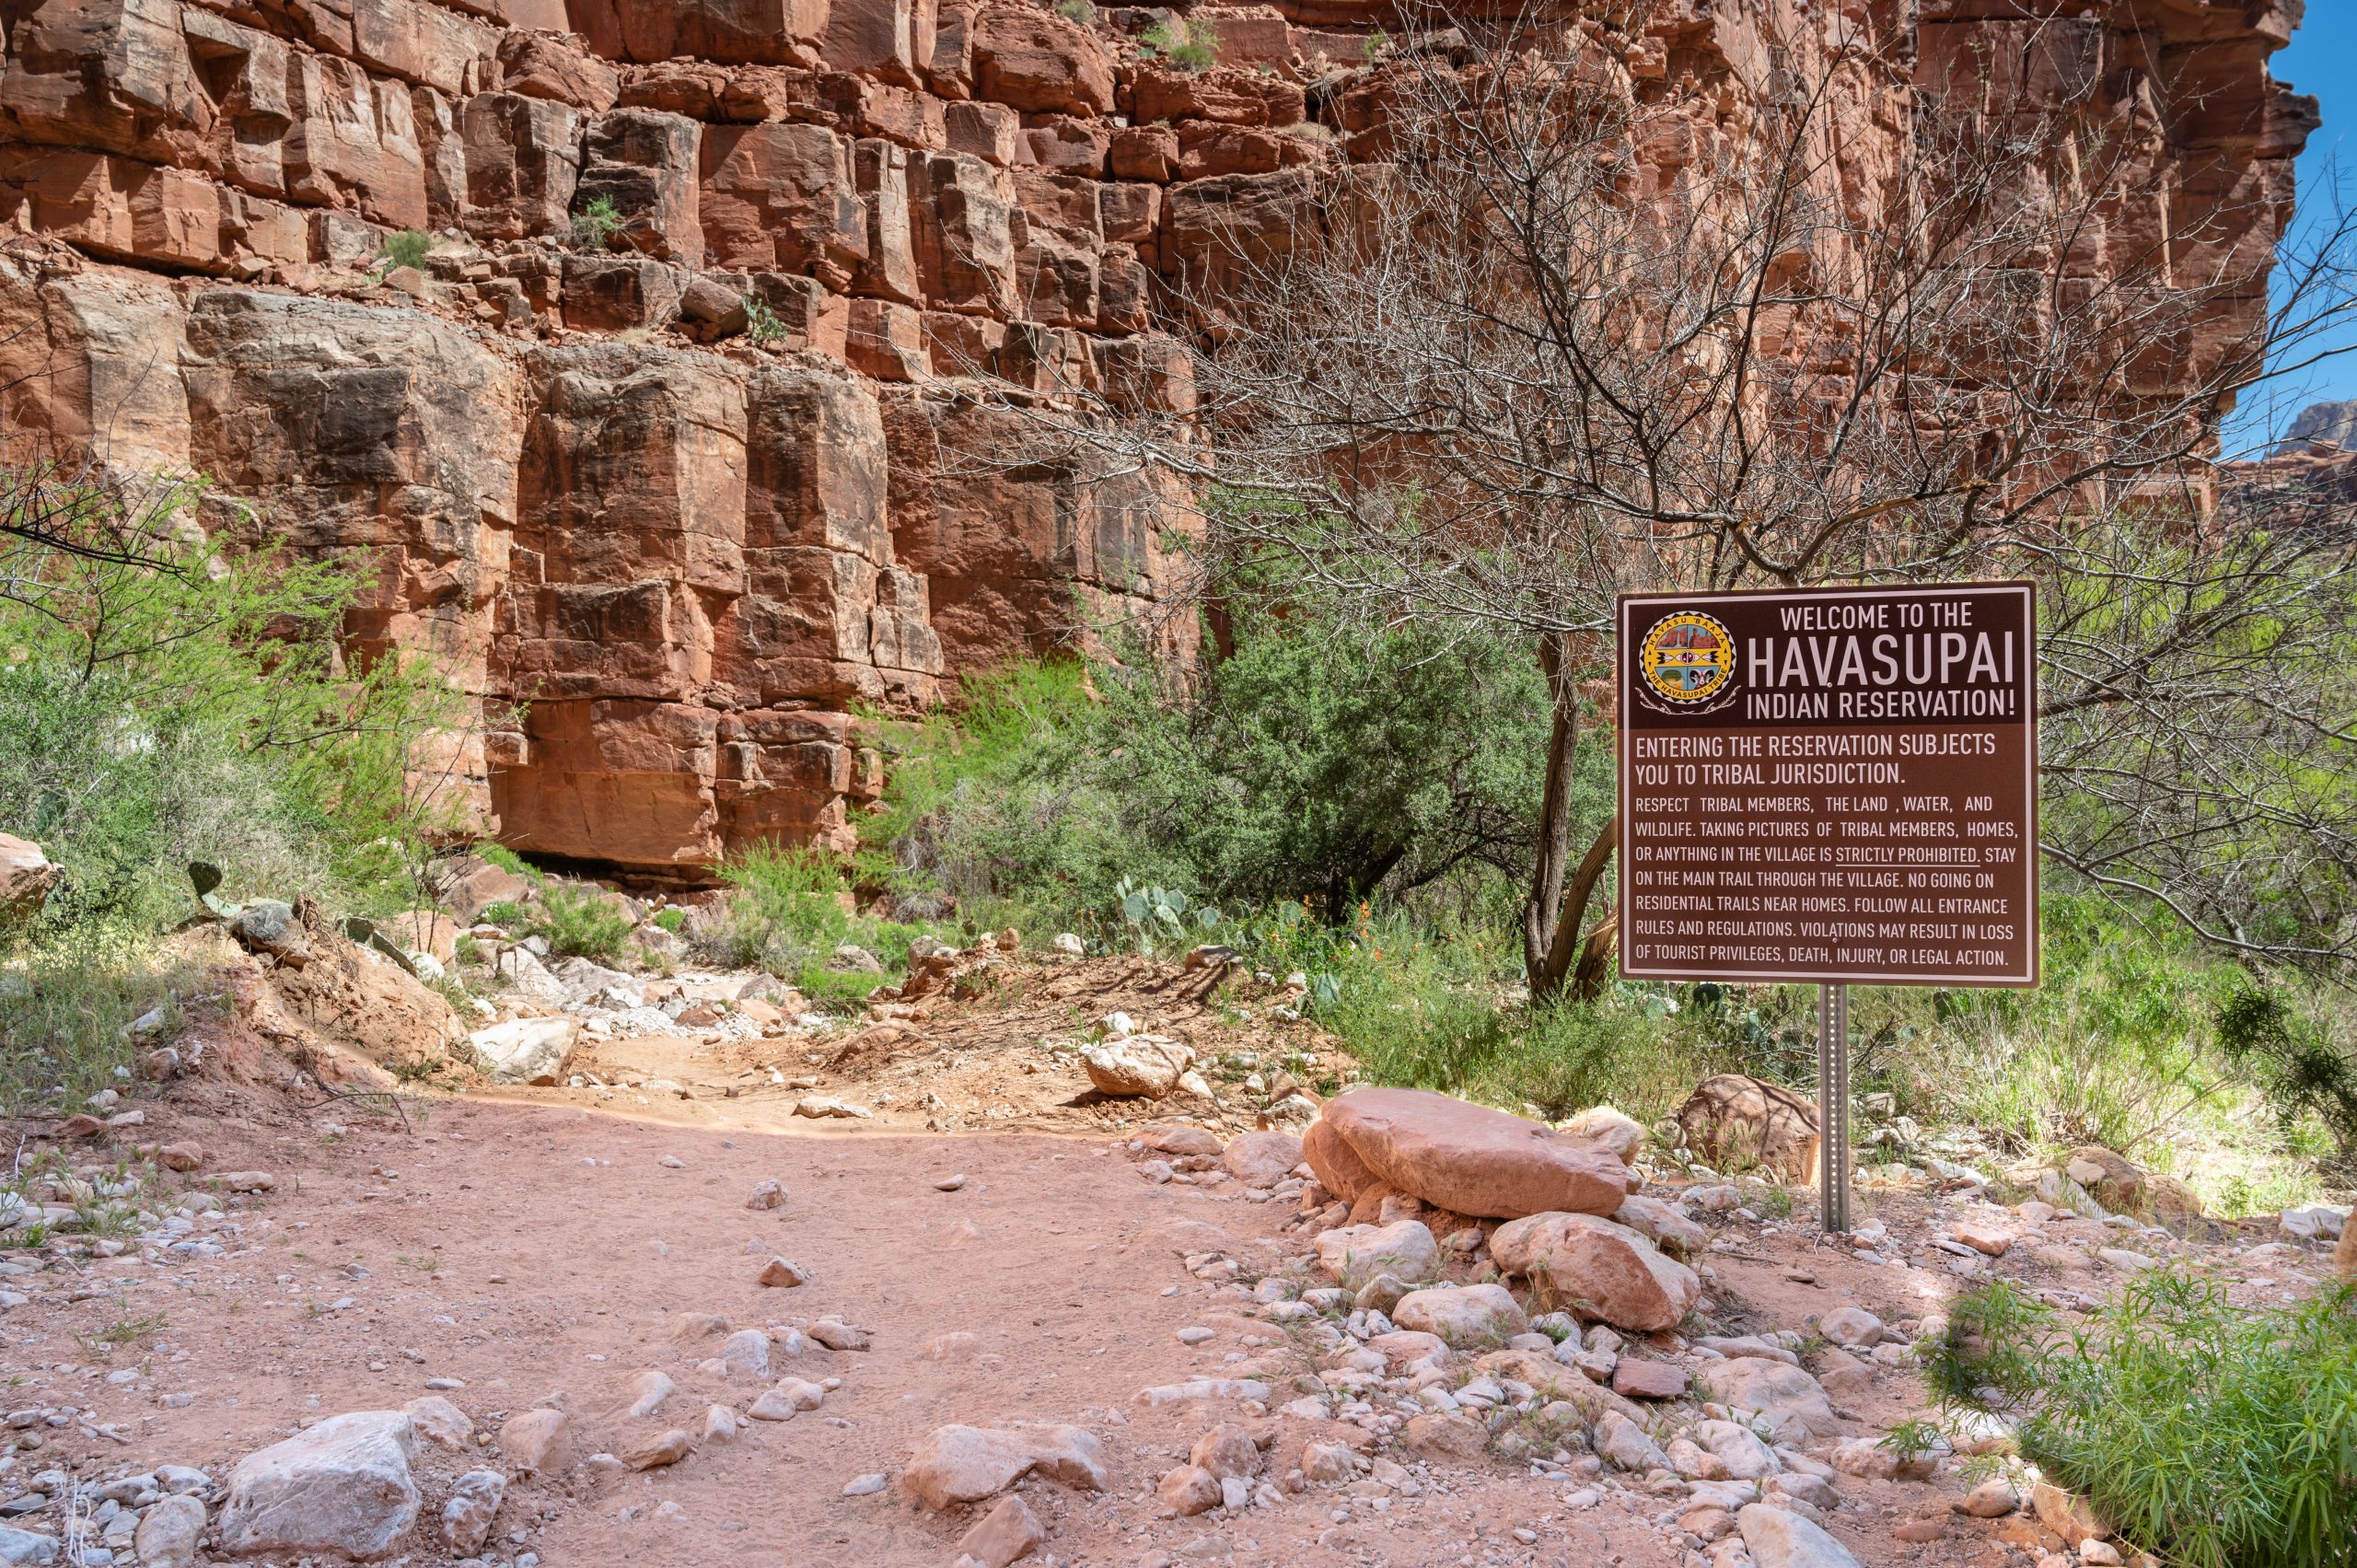
You must obtain a permit to visit Havasupai, and getting one has become increasingly more difficult each year. Reservations open on February 1 at 8 am Arizona time every year (double check your alarm because Arizona doesn’t observe Daylight Saving Time). All reservations are booked online here, and I highly recommend creating an account and inputting payment info in advance because permits sell out almost immediately after they’re released.
Reservations are for four days and three nights; no day hiking is permitted. Plus, you’ll want all four days to have adequate time to explore and rest before the 10-mile hike out of the canyon. I suggest having multiple dates ready to increase your chances of securing a permit — be flexible! In terms of cost, unfortunately, it rises every year. When we went in 2023, we paid $395 per person for a 3-night reservation. For 2024, campground reservations are $455 per person for three nights. It’s pricey but worth the splurge!
Other good to know things about the permits:
- There is only one trip leader whose name goes on the permit, and the reservation is only good if that person is at check-in with a valid photo ID.
- If the trip leader cannot go, you can transfer the reservation to a PATL (Potential Alternate Trip Leader). Once you make a reservation, you can’t change the PATL list for that reservation, so it’s a good idea to name a PATL just in case.
- Regardless of who the trip leader or PATL is, all visitors must make an account before arrival to confirm agreement with Havasupai Rules and Laws.
- Reservations are non-refundable and non-changeable; however, you can list your permit on the transfer list for sale. Once someone else buys your permit, you’ll receive a refund minus a 10% transfer fee.
- Don’t be discouraged if you don’t get permits on the first go. Check the cancellation/transfer list daily at 8 am Arizona time for permits you can snag.
- It’s mandatory to make pack mule reservations ahead of time if you choose to use the mules. It costs $400 round trip for up to 4 bags, 32 pounds per bag, with 36x19x19 size restrictions. Be mindful that it can take a while to get your bags.
Preparation for Havasupai
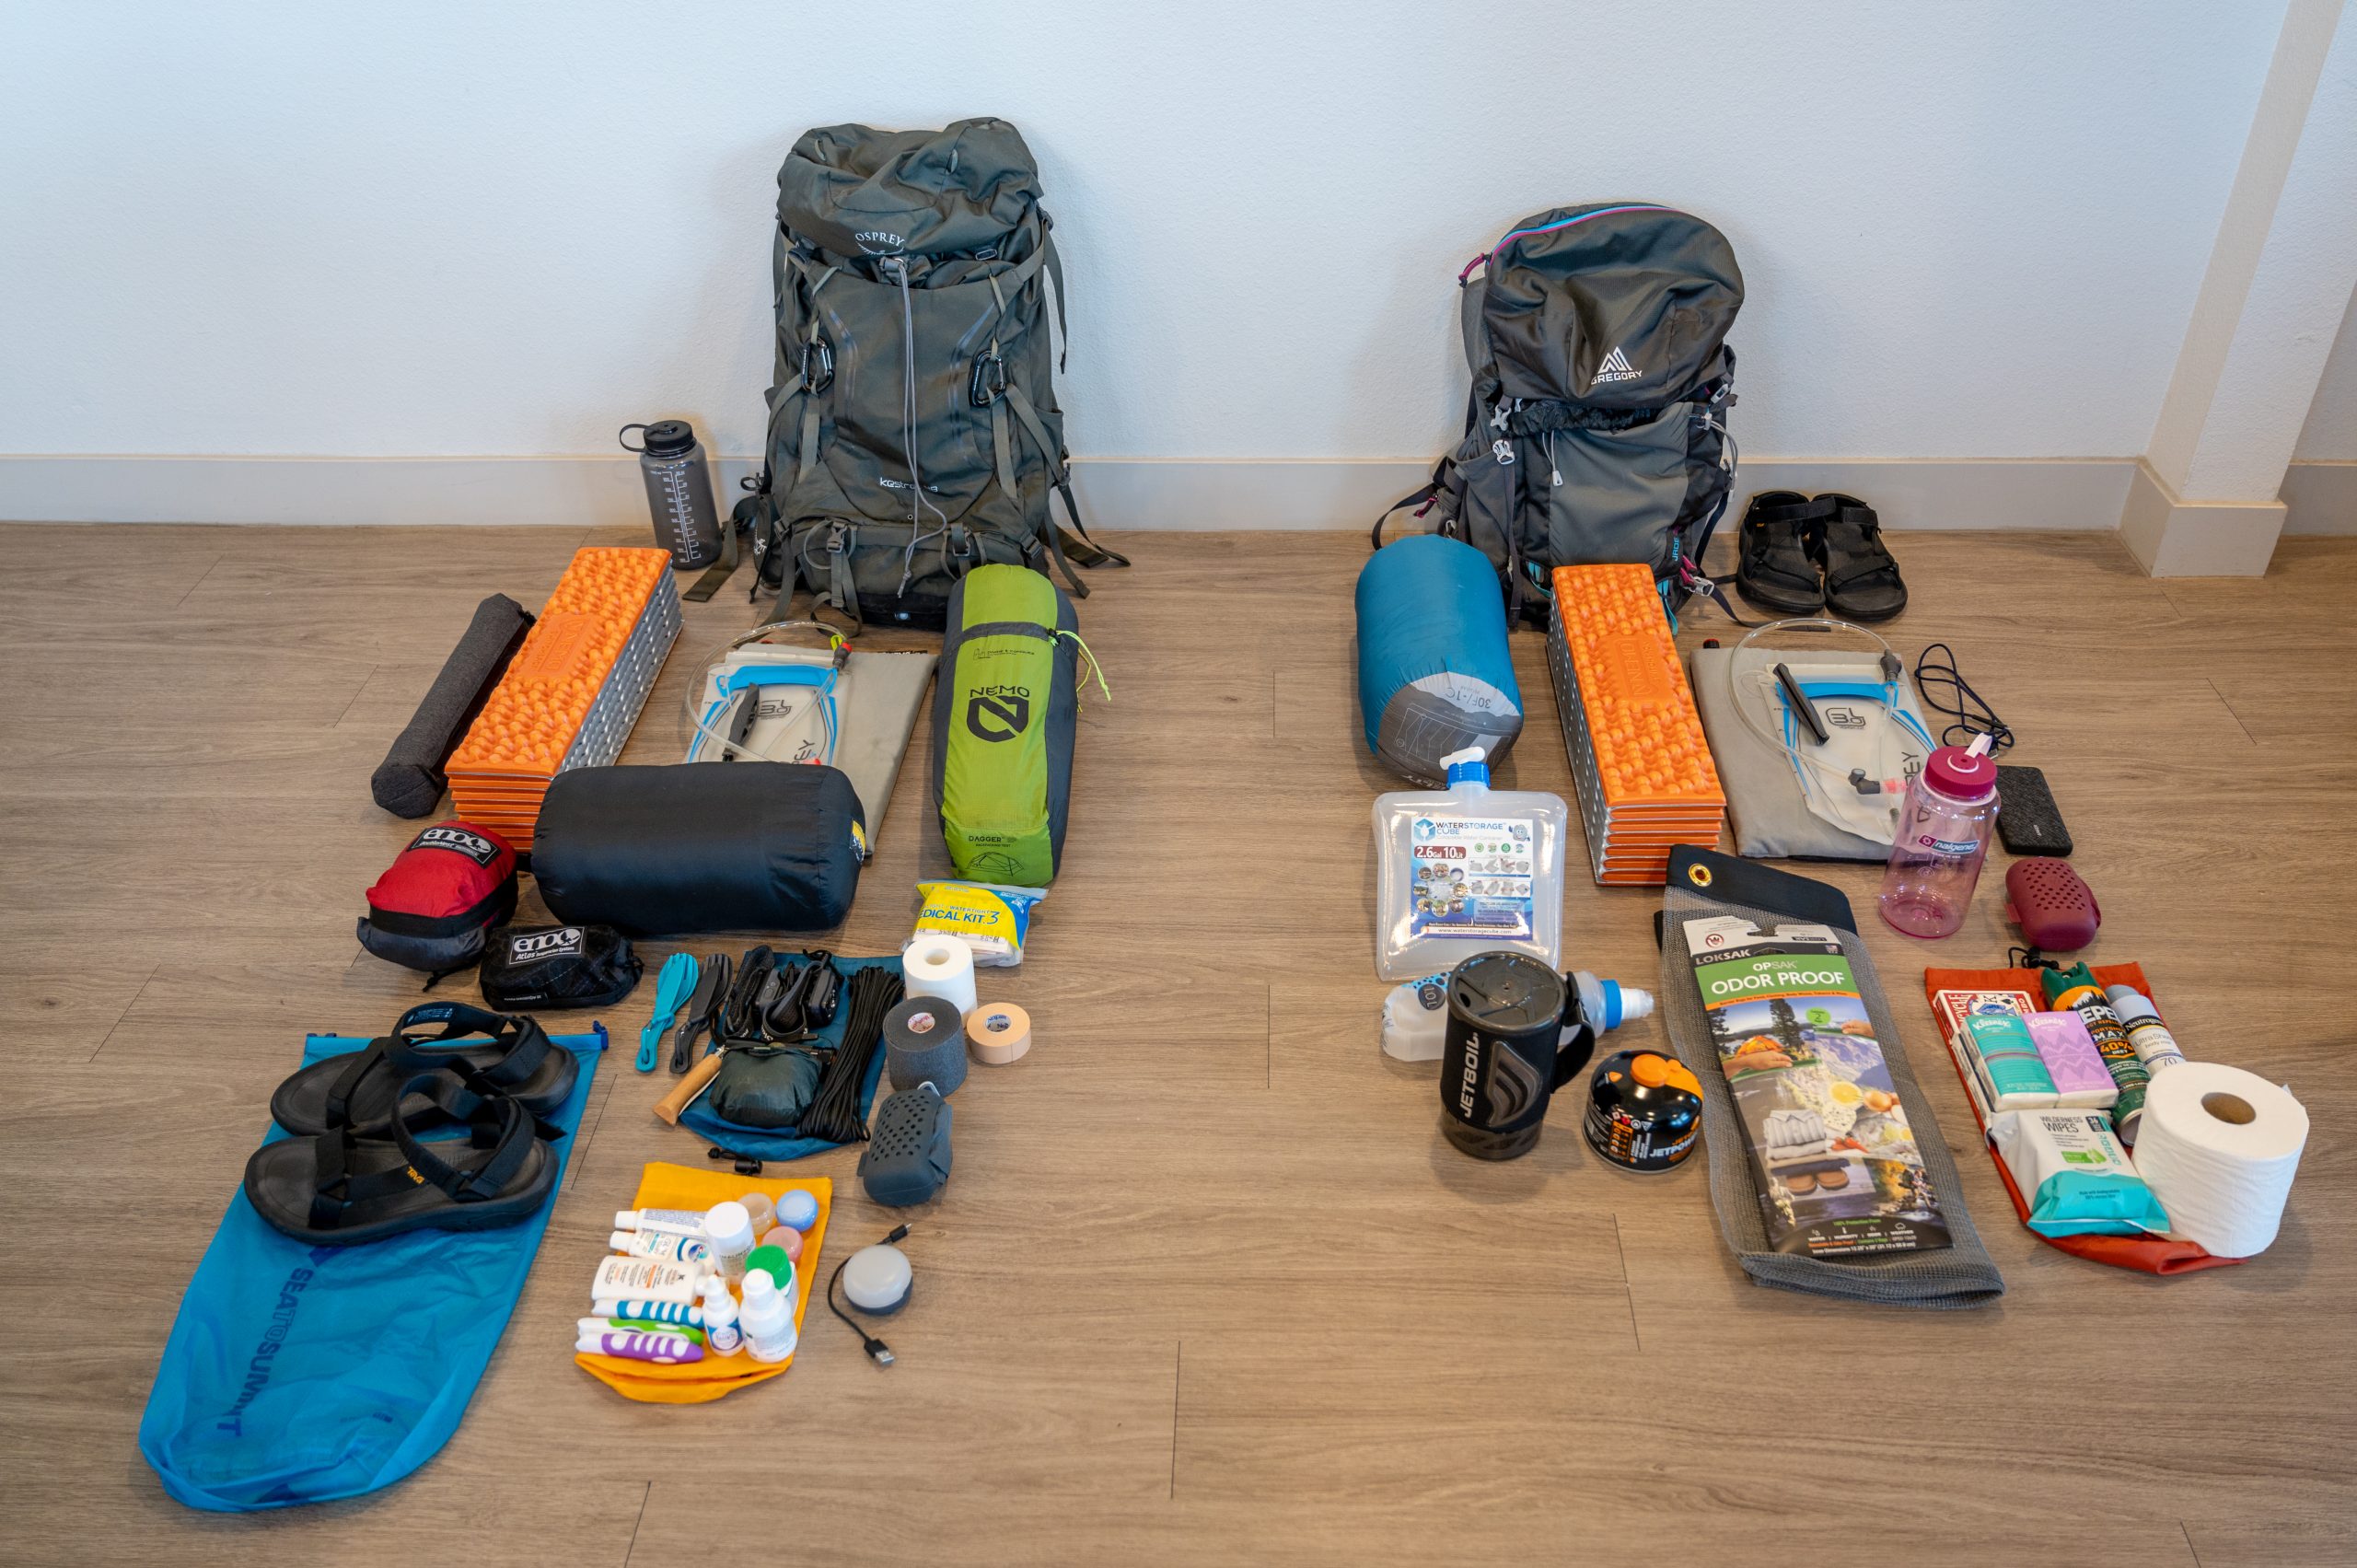
This hike may be easy or hard, depending on your experience level. I’ve done plenty of hiking, but this was my first backpacking trip, so I wanted to be prepared between the hike’s length and my backpack’s load. Here’s how we prepared in advance for the trip:
- We hiked every week for a couple of months leading up to the big trek, increasing the length of our hike and the weight of our pack each time.
- Make a realistic meal plan to pack enough food but minimize the possibility of overpacking and adding unnecessary weight to your backpack.
- Buy appropriate gear — it makes a world of difference. I created a comprehensive packing list, including gear, clothing, food, toiletries, and miscellaneous items.
Havasupai Itinerary
The Day Before
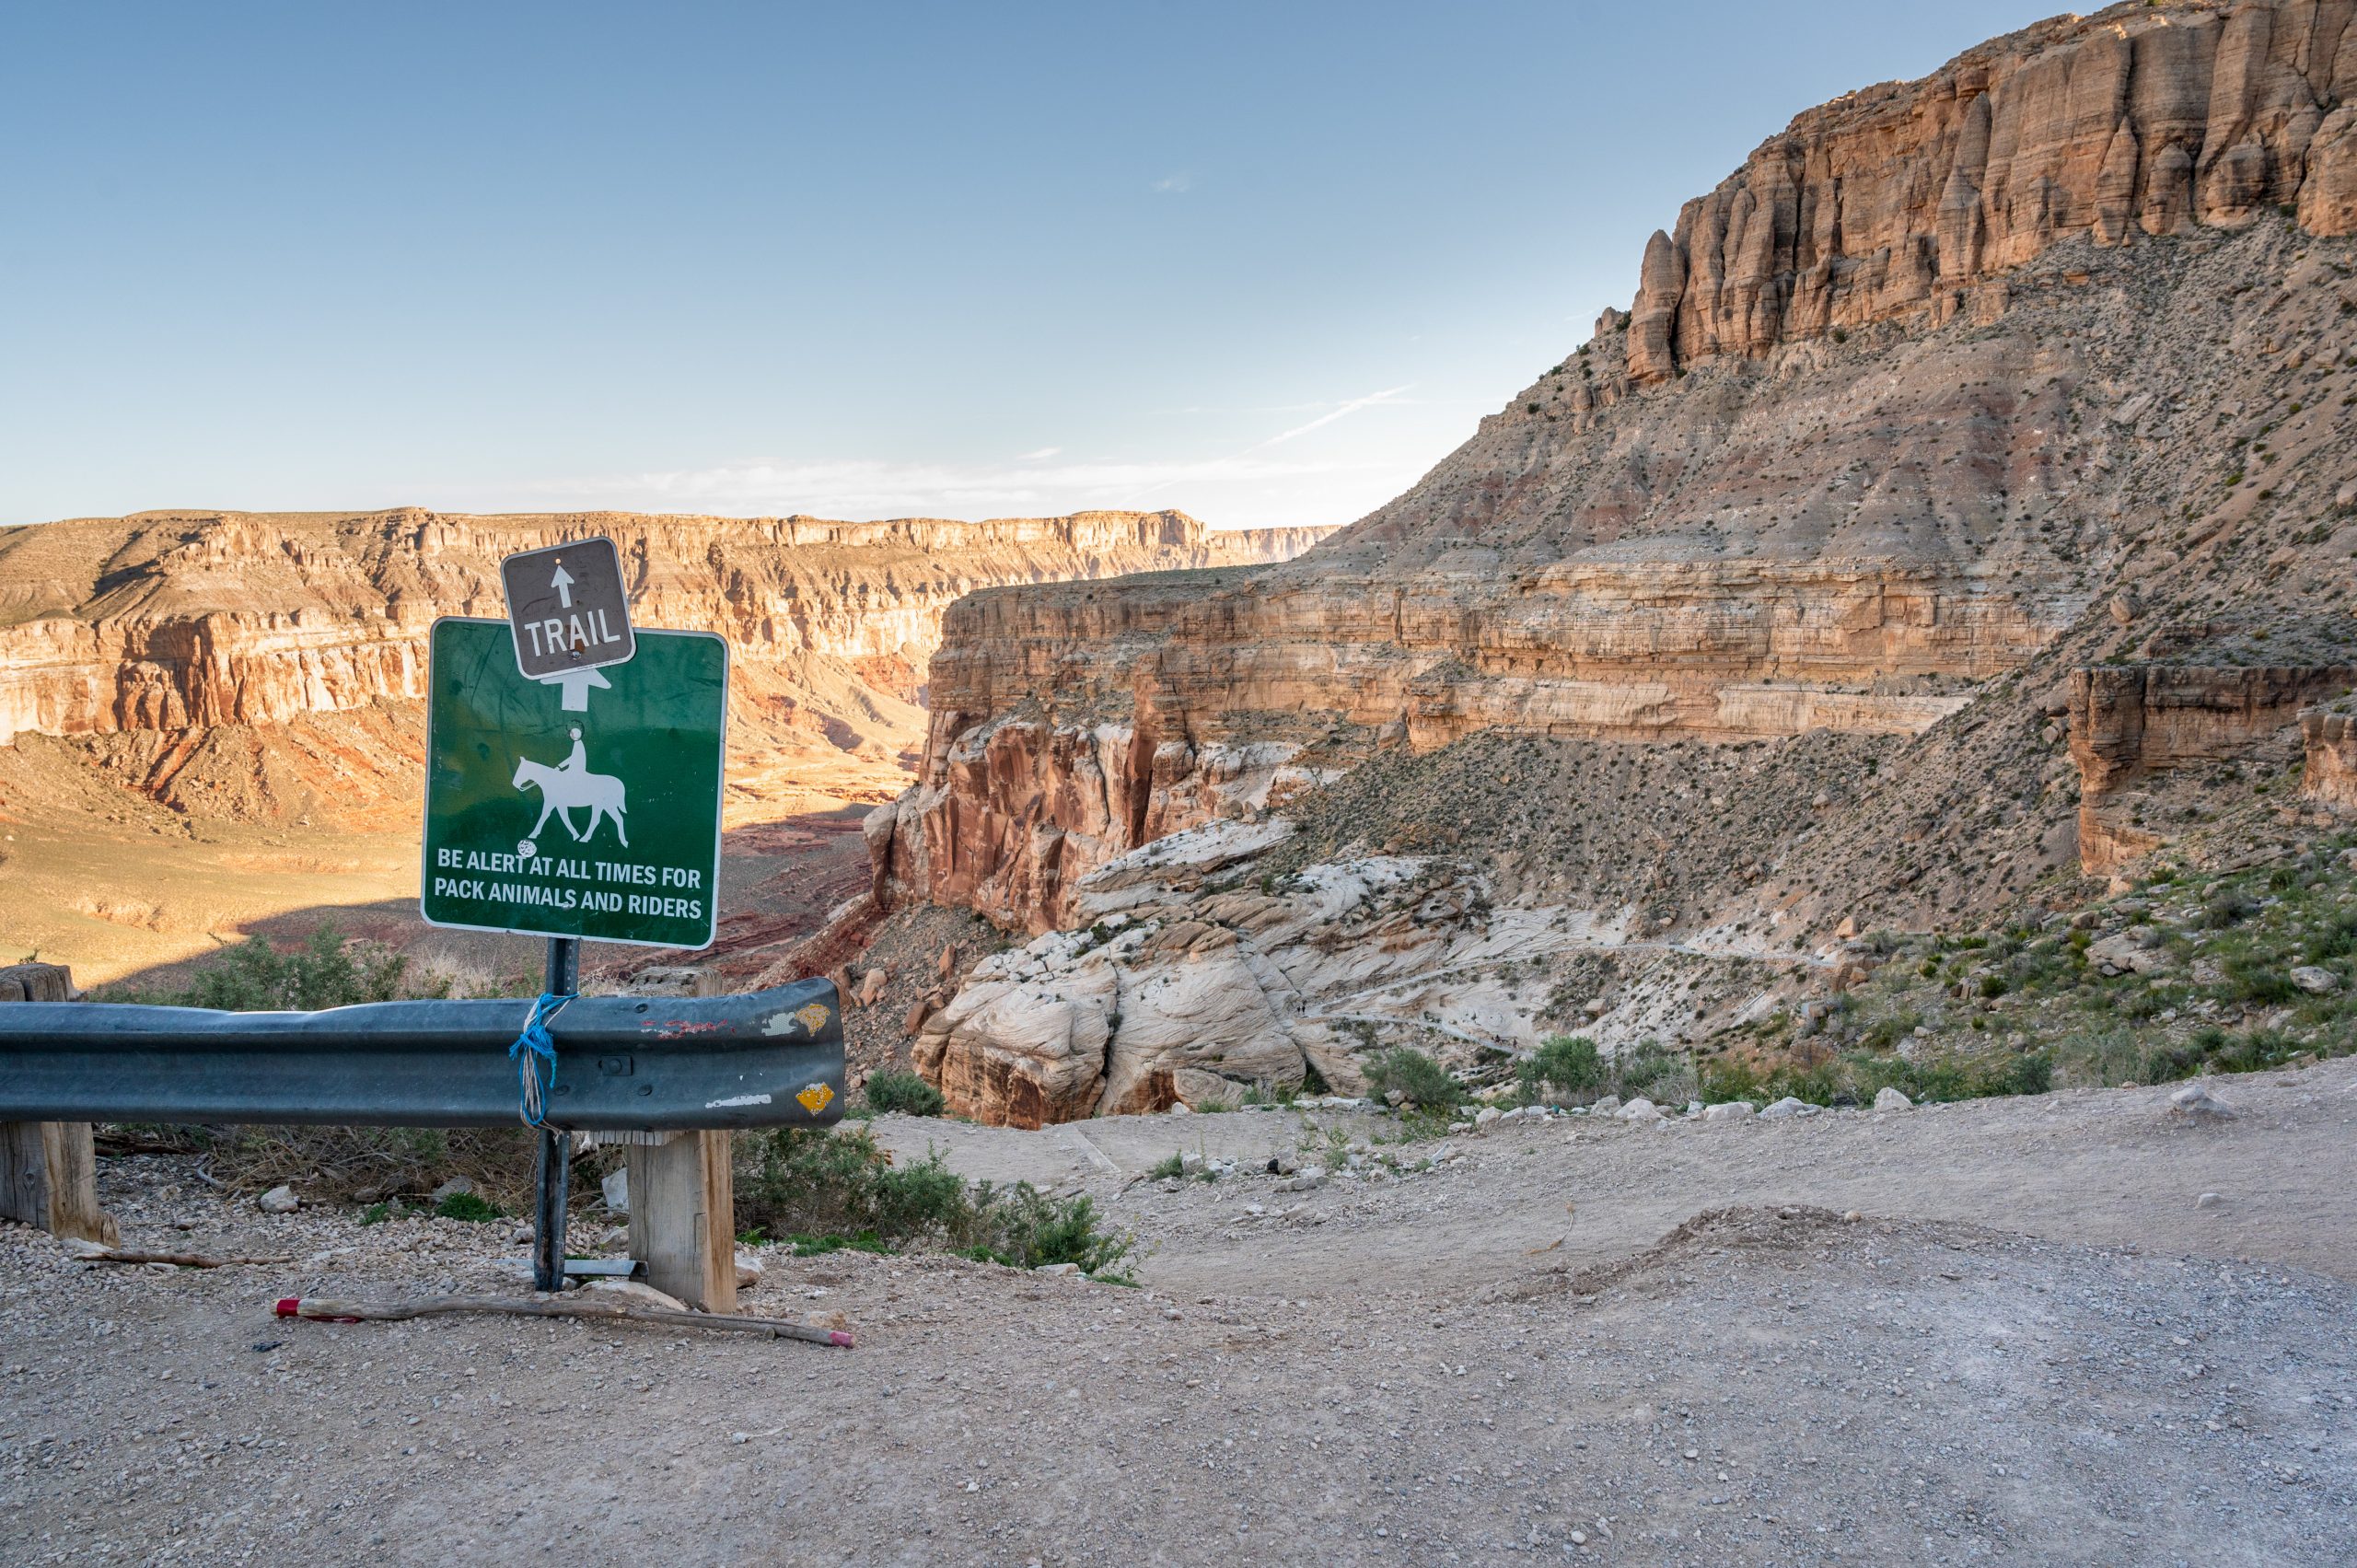
Check in and pick up your permit and wristbands at Grand Canyon Caverns & Inn no later than noon on the first day of your reservation. It’s advisable to check in the day before to get an early start on the hike the following morning. Ensure the trip leader (discussed above under the permit process) is present because they are responsible for the check-in procedure. Once you check in, staying there overnight and getting a good night’s sleep before the hike is recommended. Fill your car with gas for the round trip because the nearest gas station from the trailhead is in Peach Springs (70 miles away). Also, don’t forget to fill up your water bladder because there is no water at the trailhead. Get prepared and settled so you’re not rushing the morning of — double-check gear and take one last shower; we even grabbed dinner at Westside Lilo’s Cafe.
Day 1
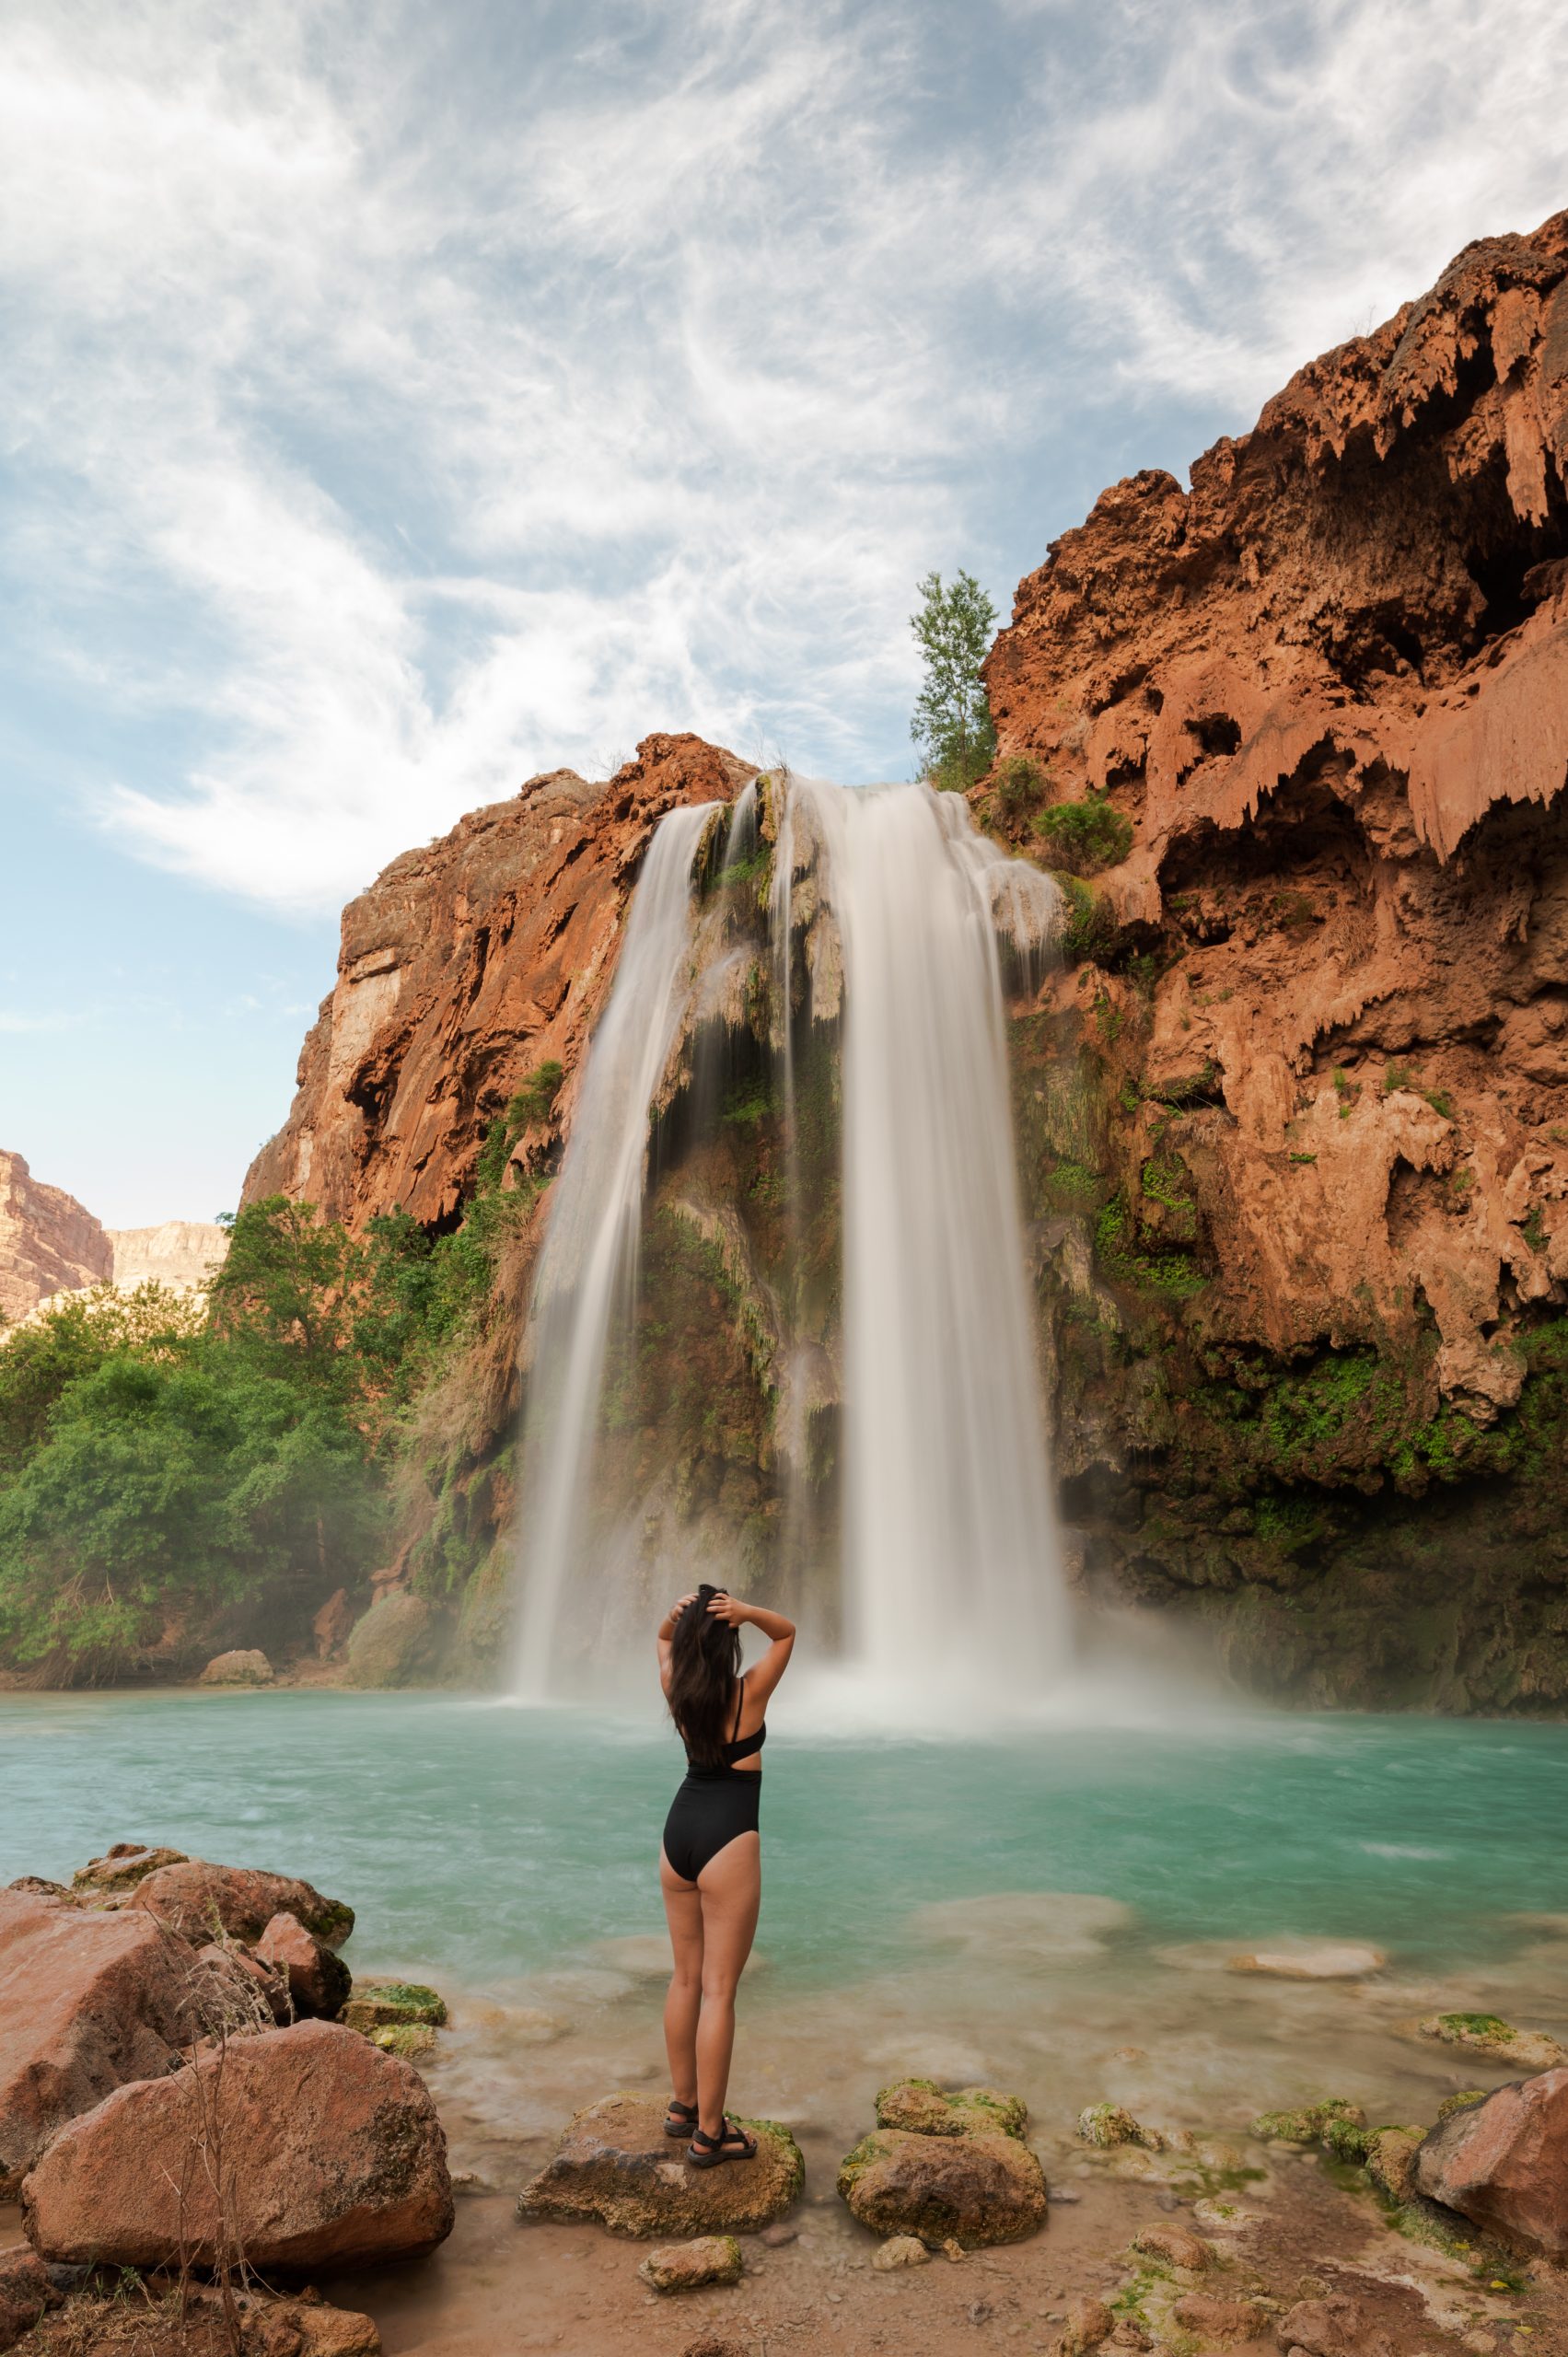
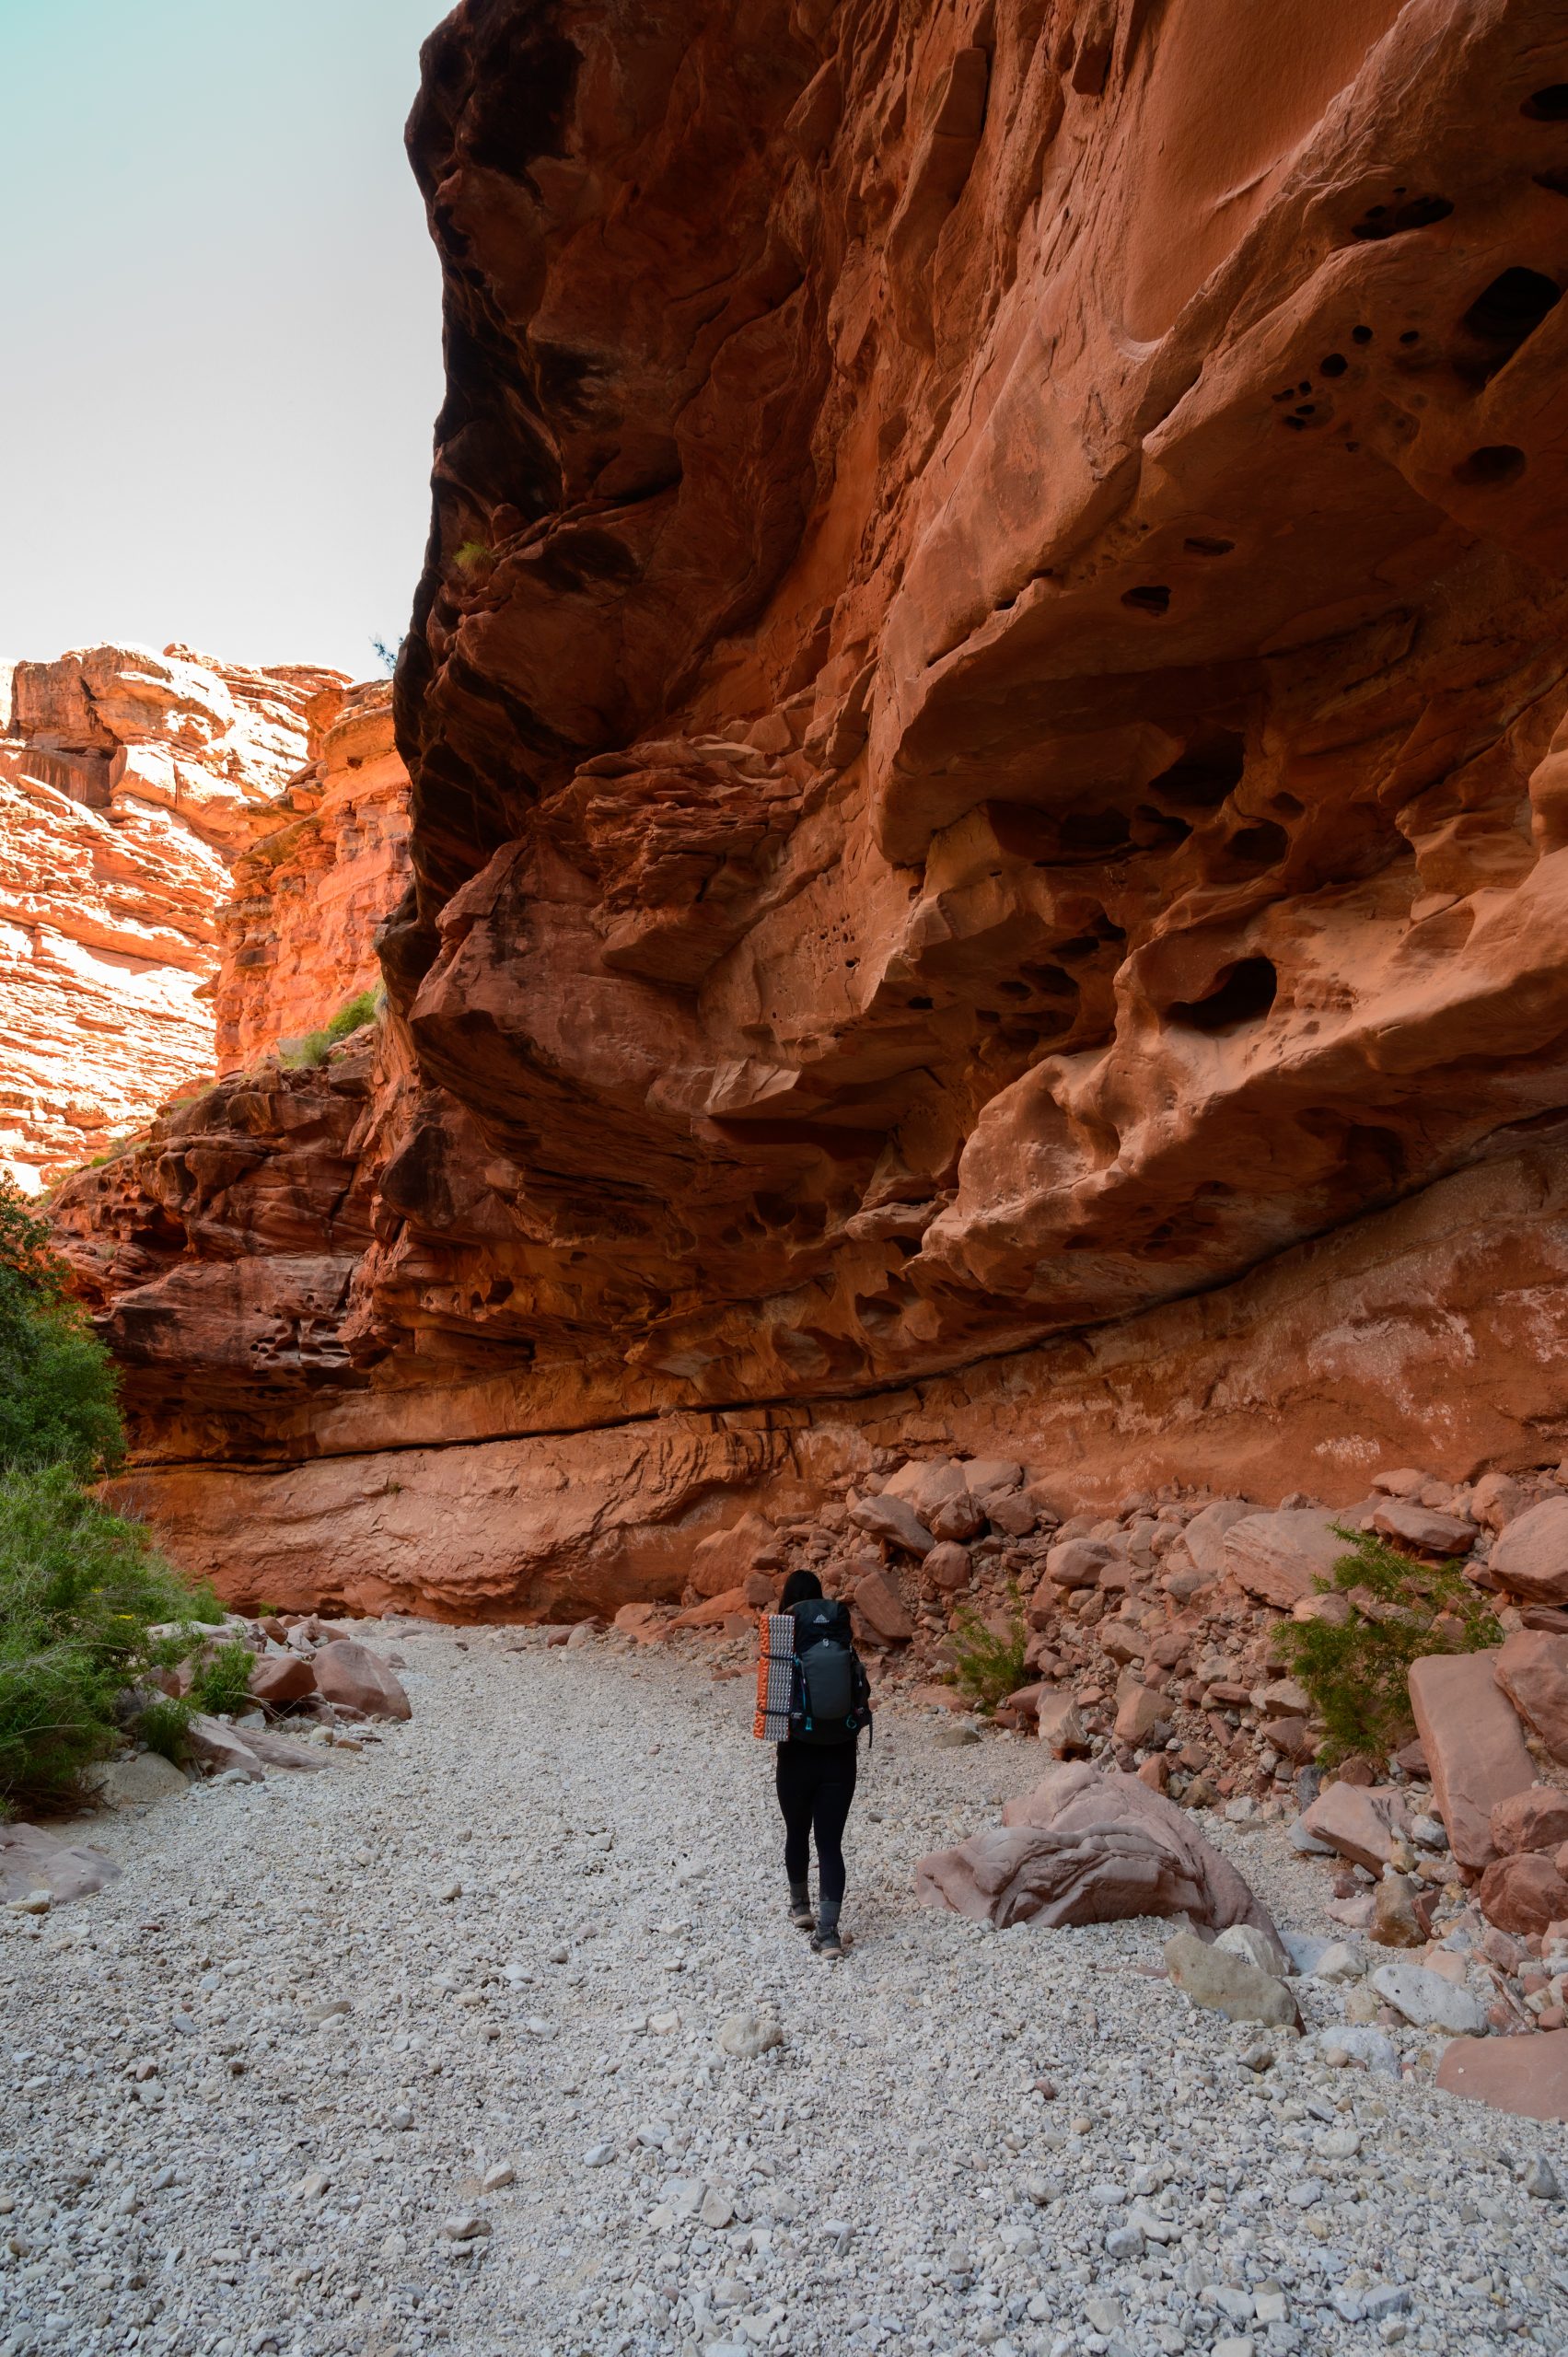
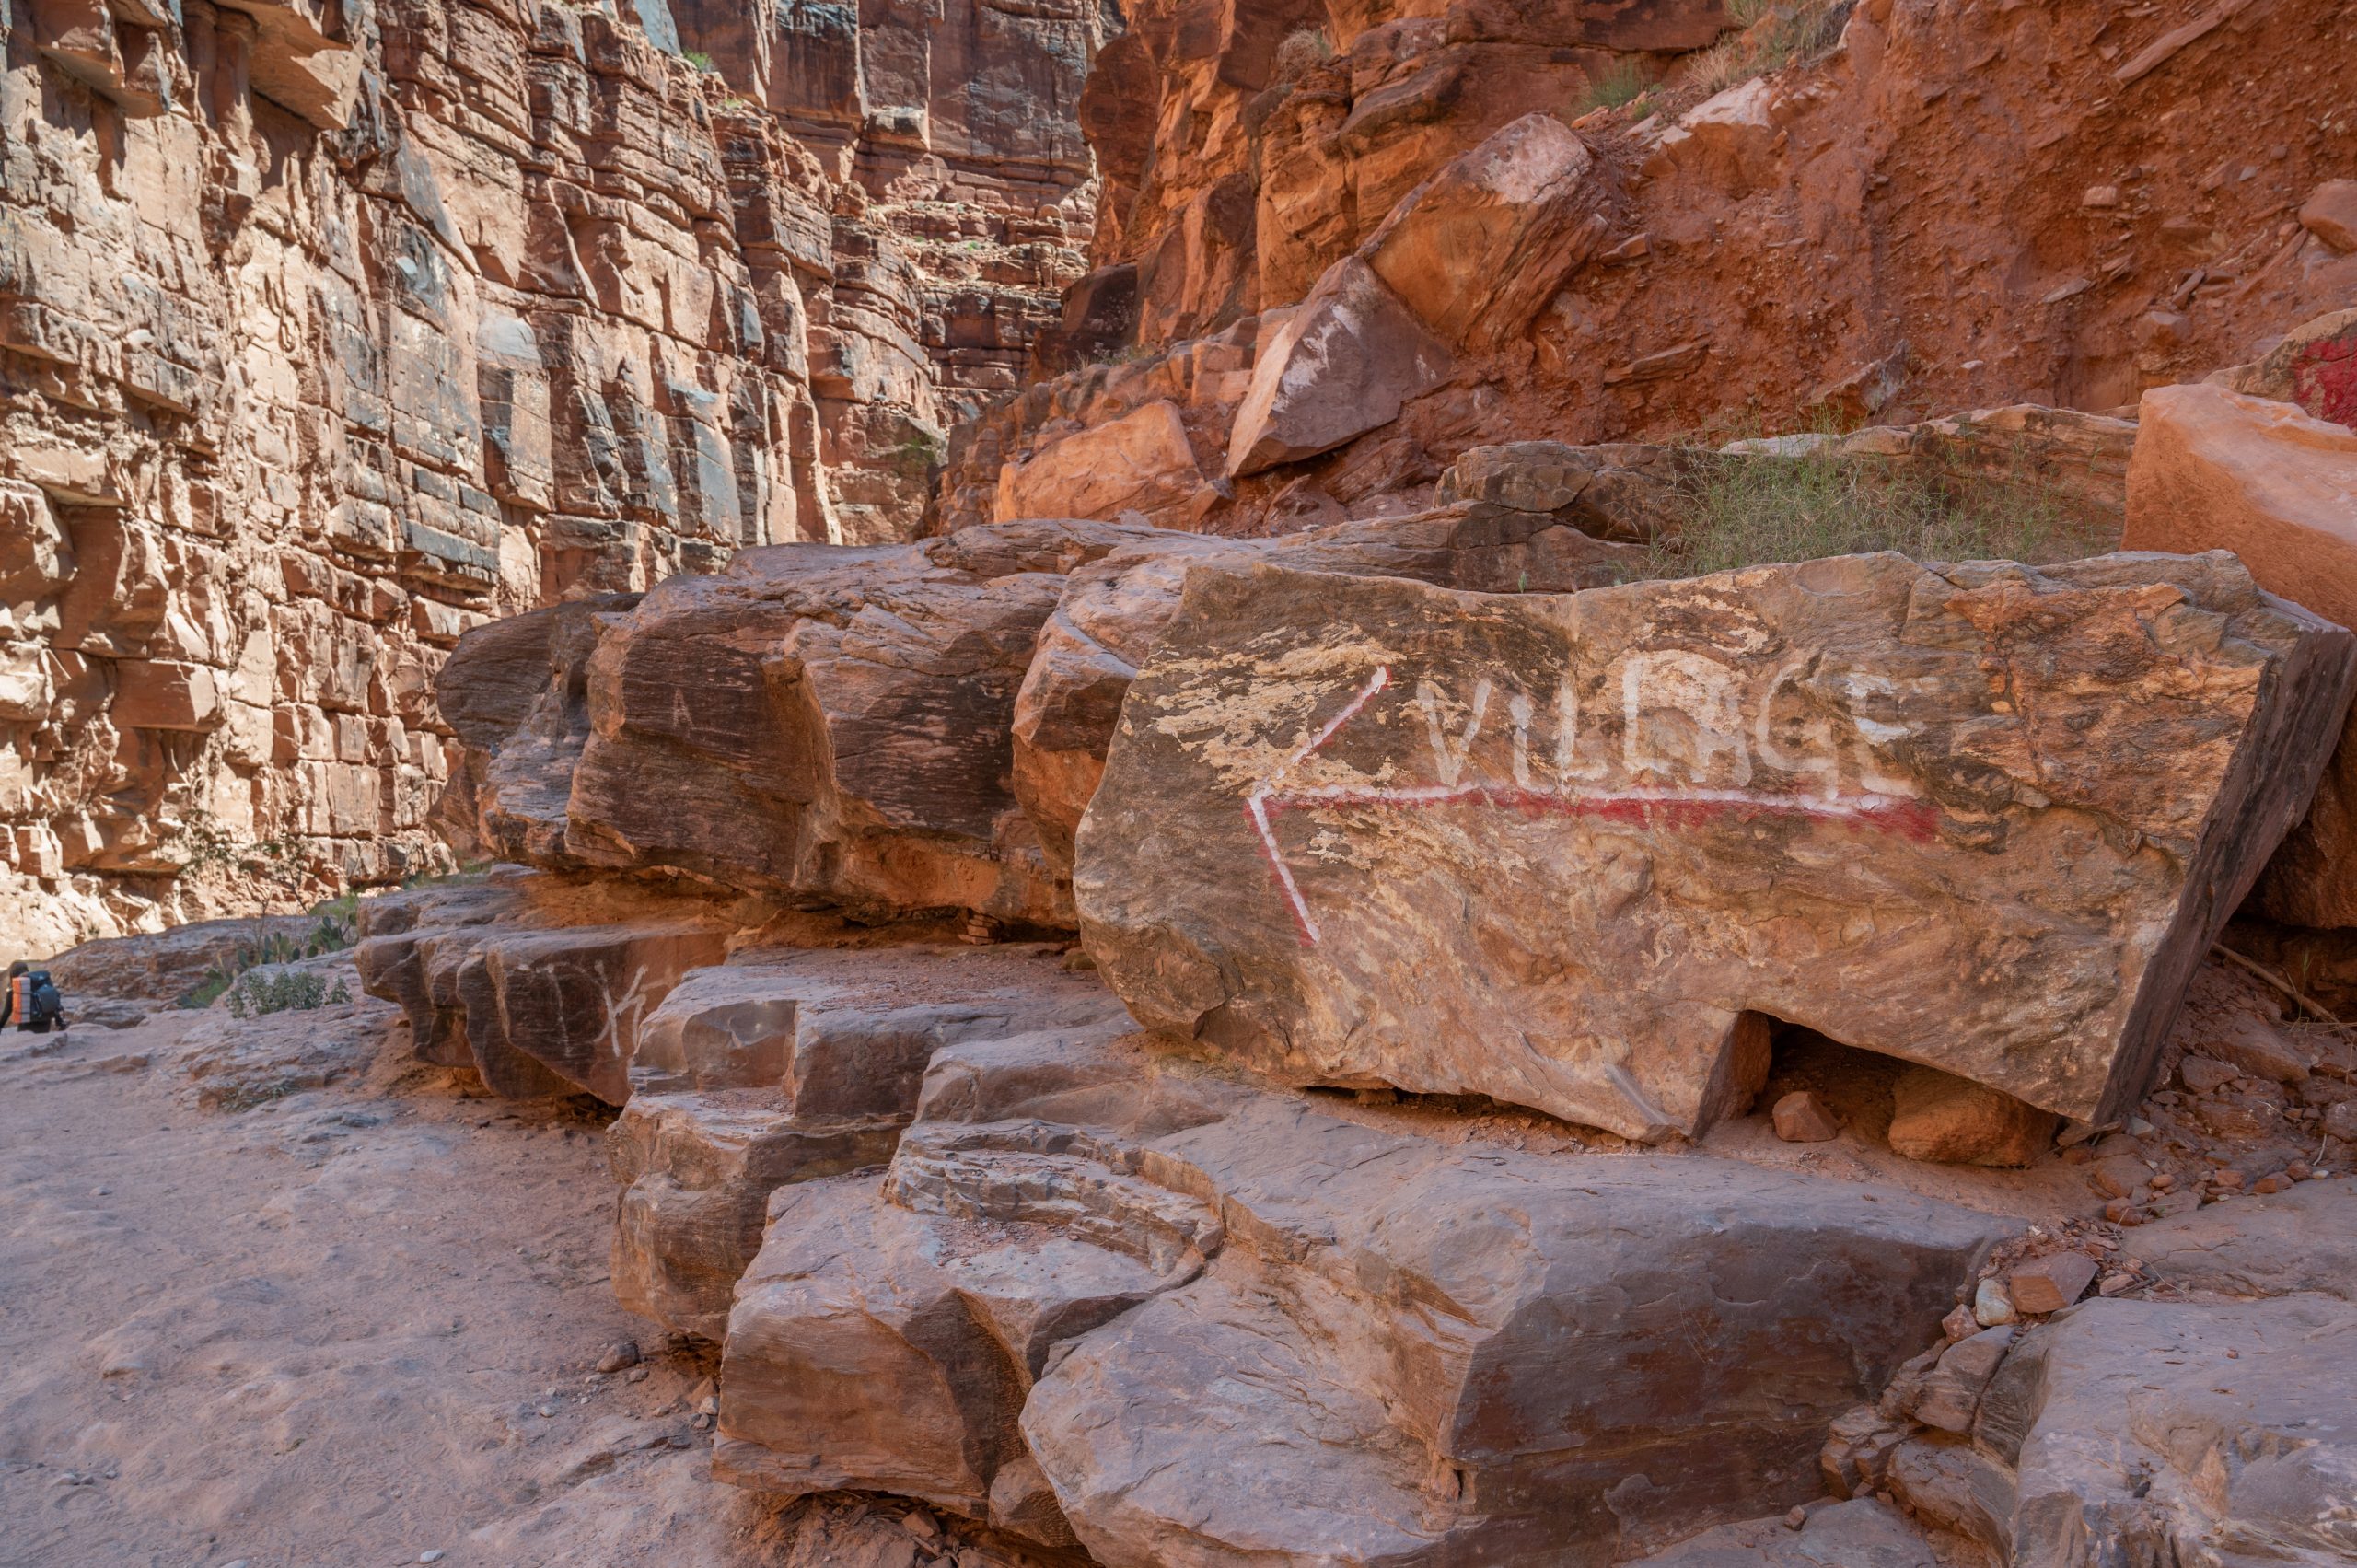
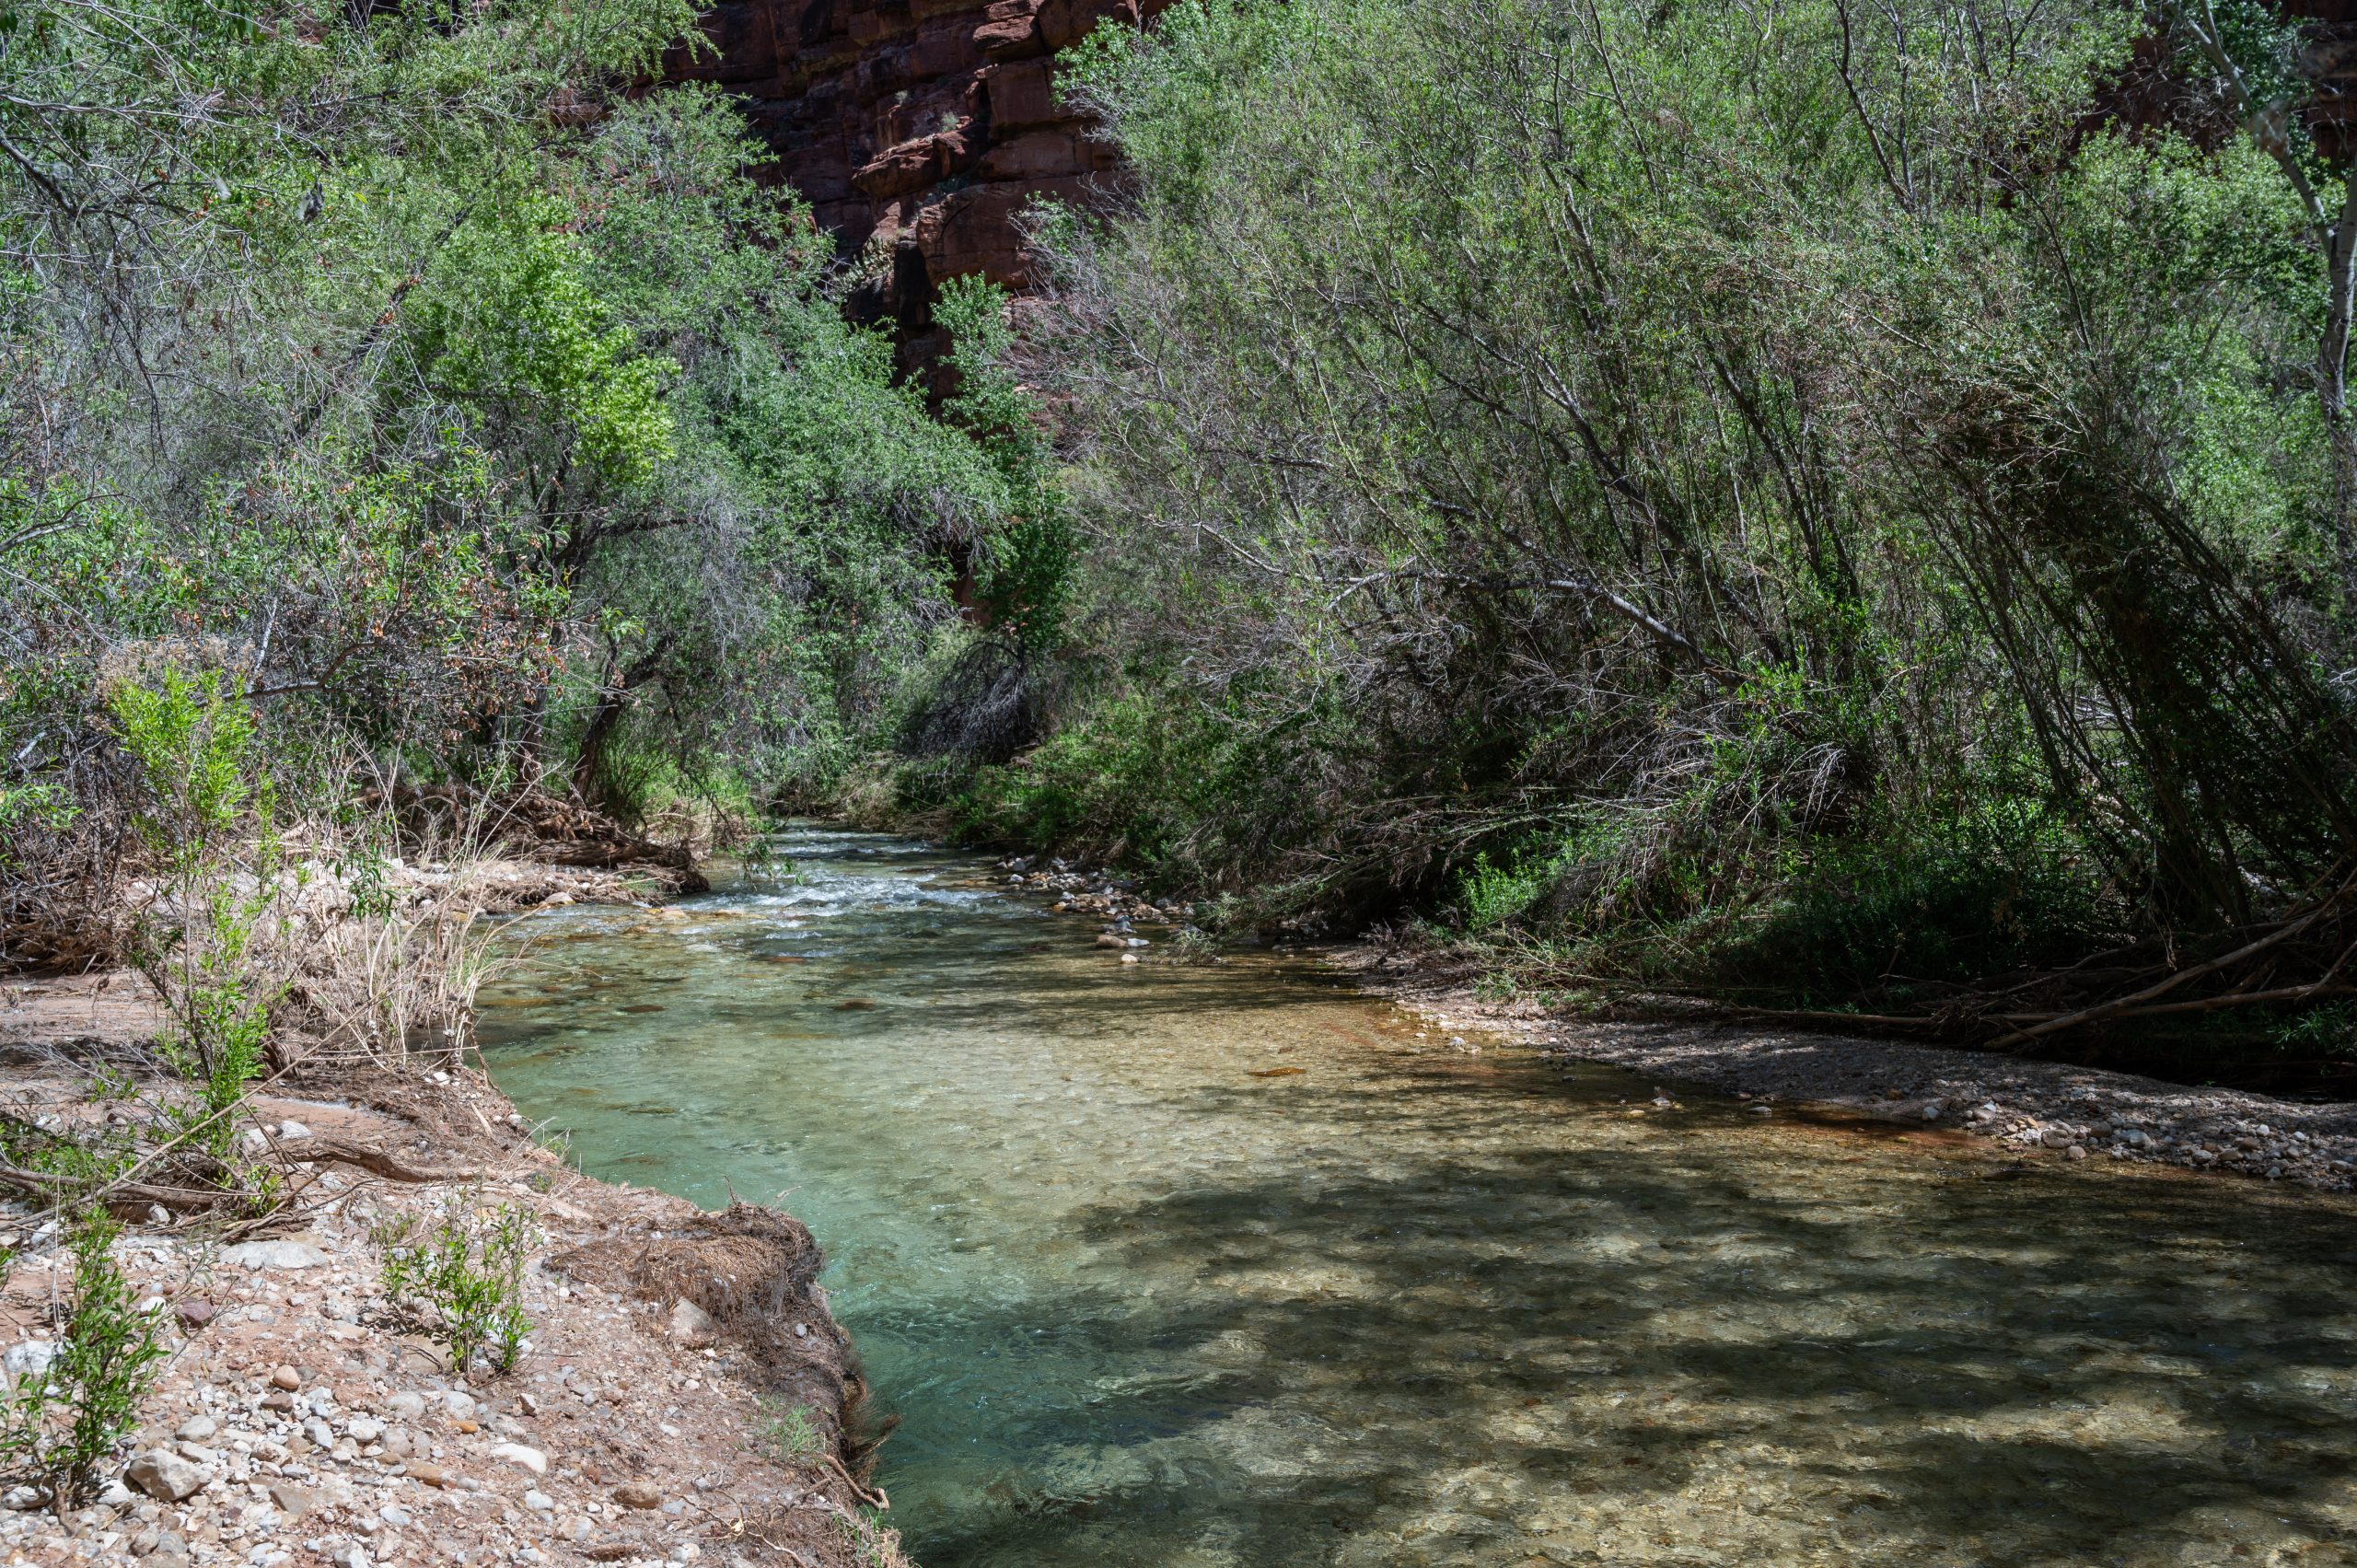
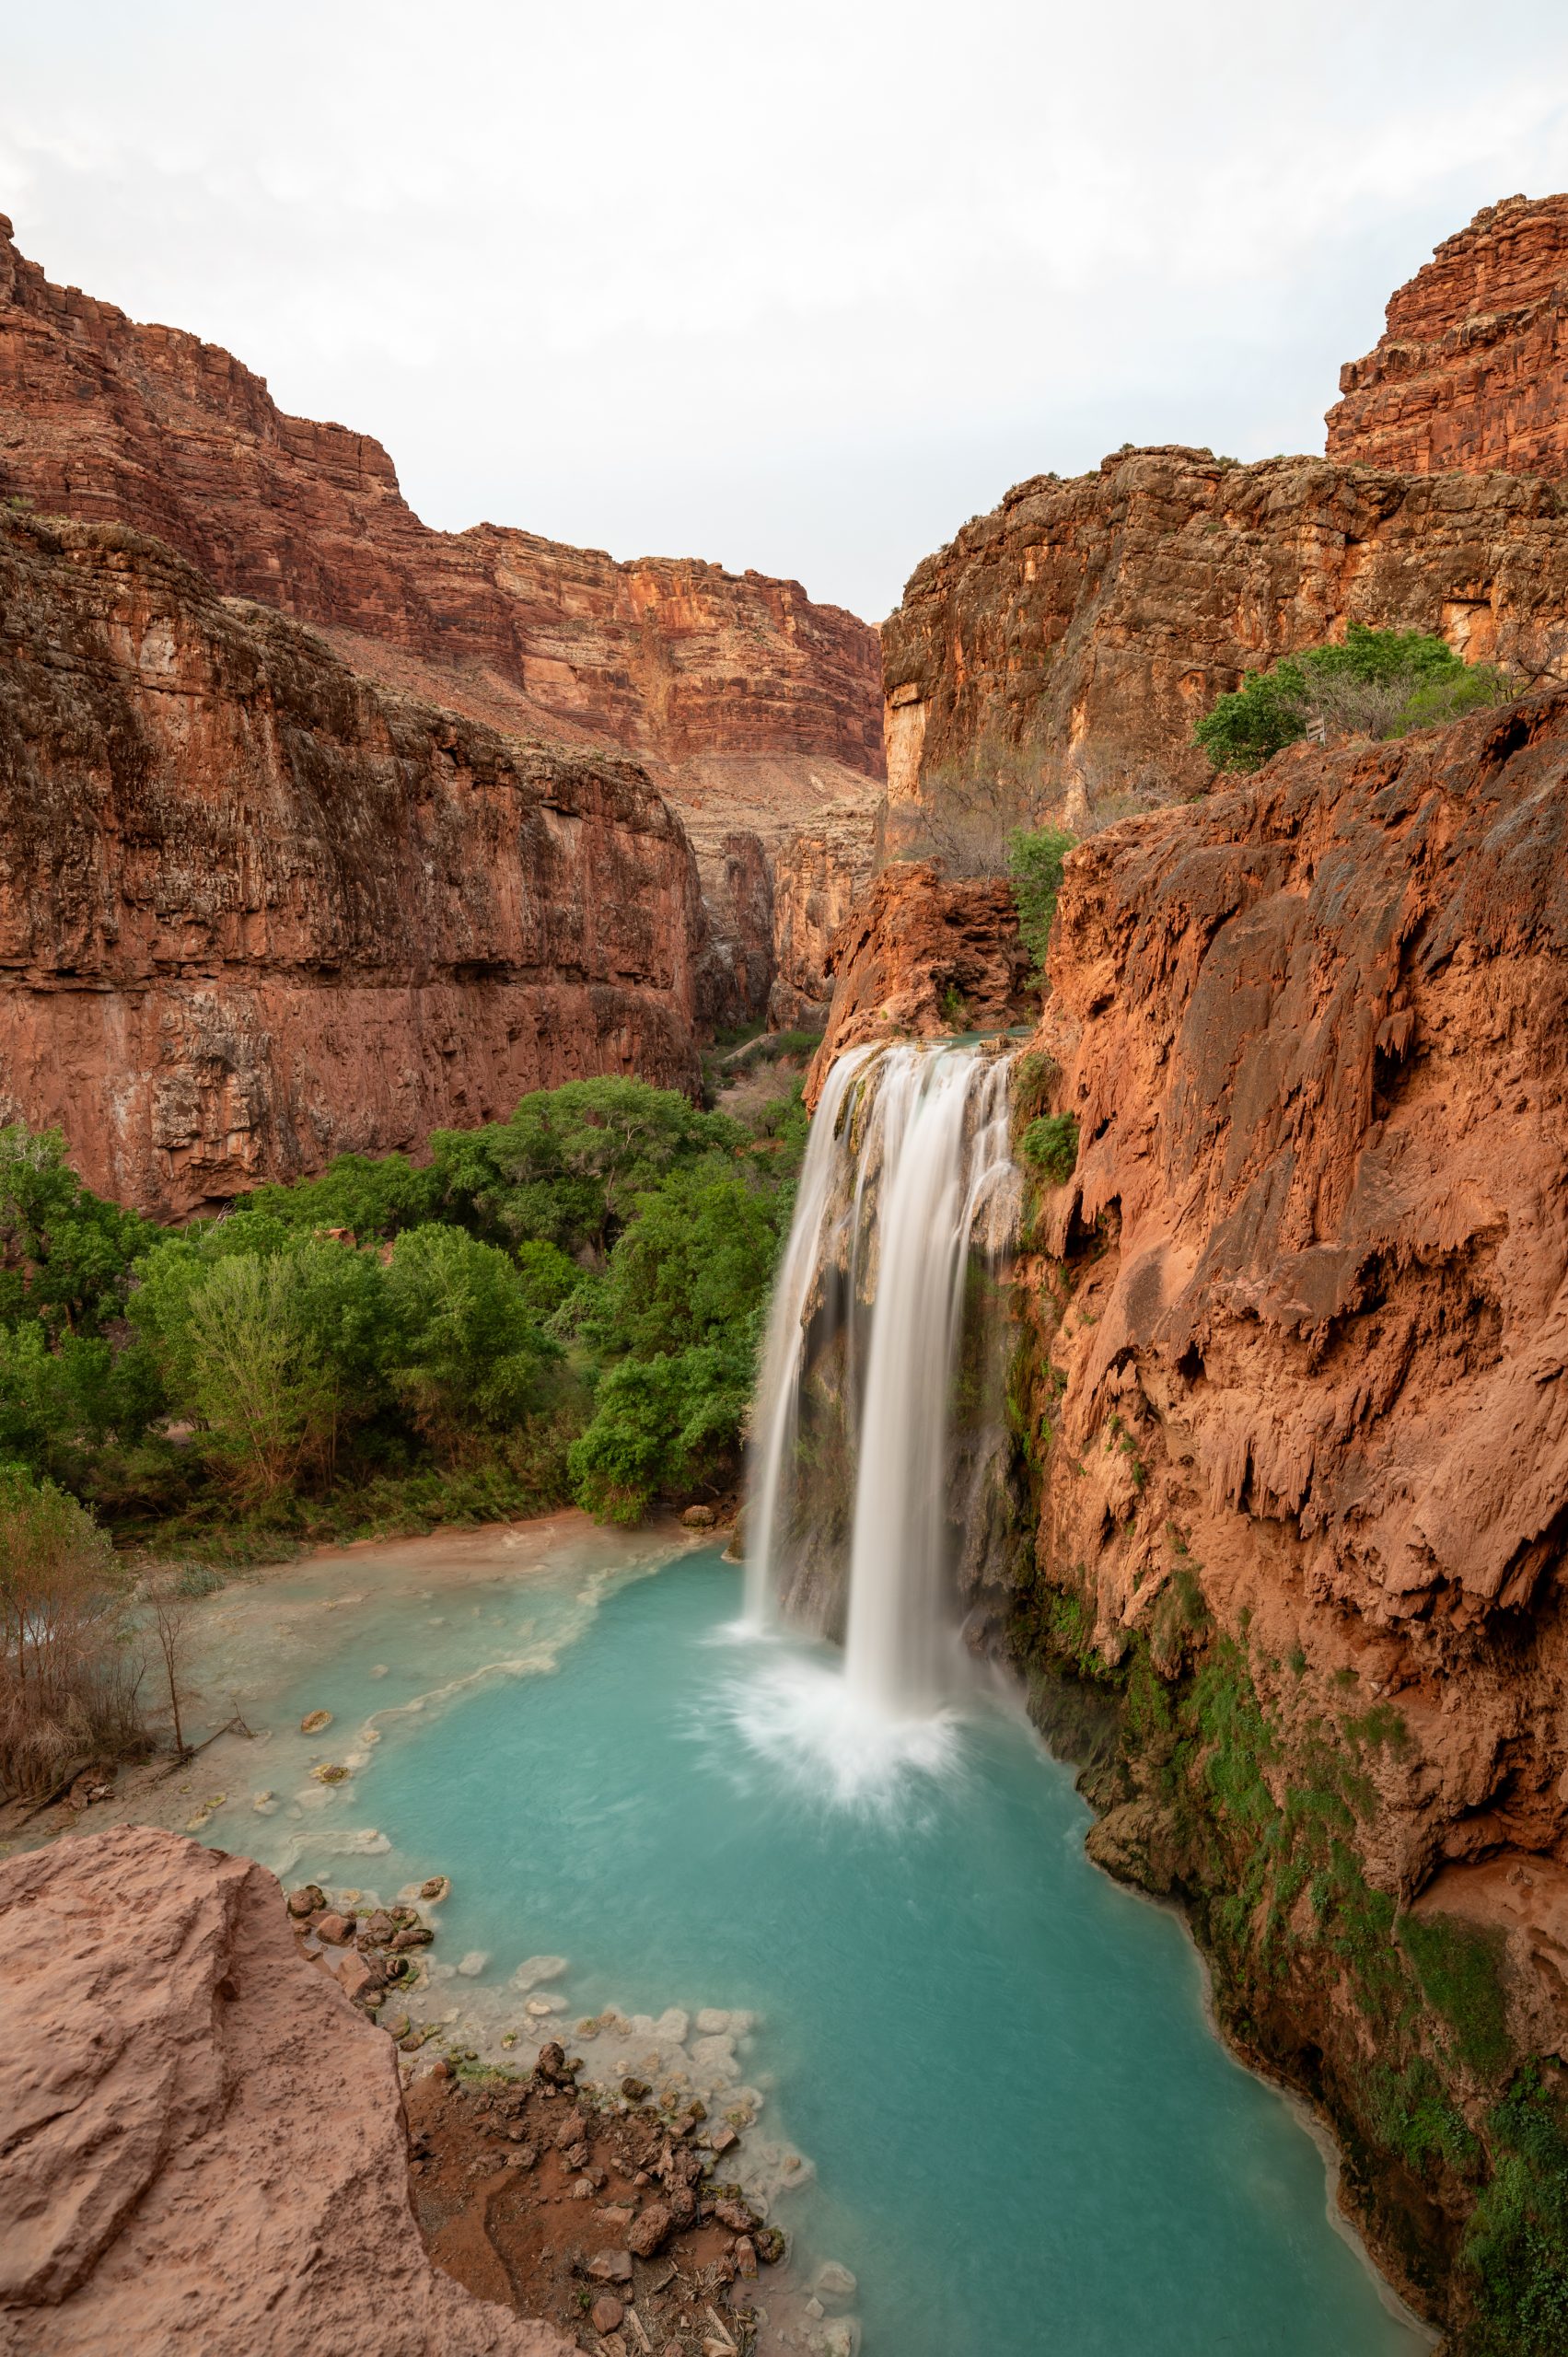
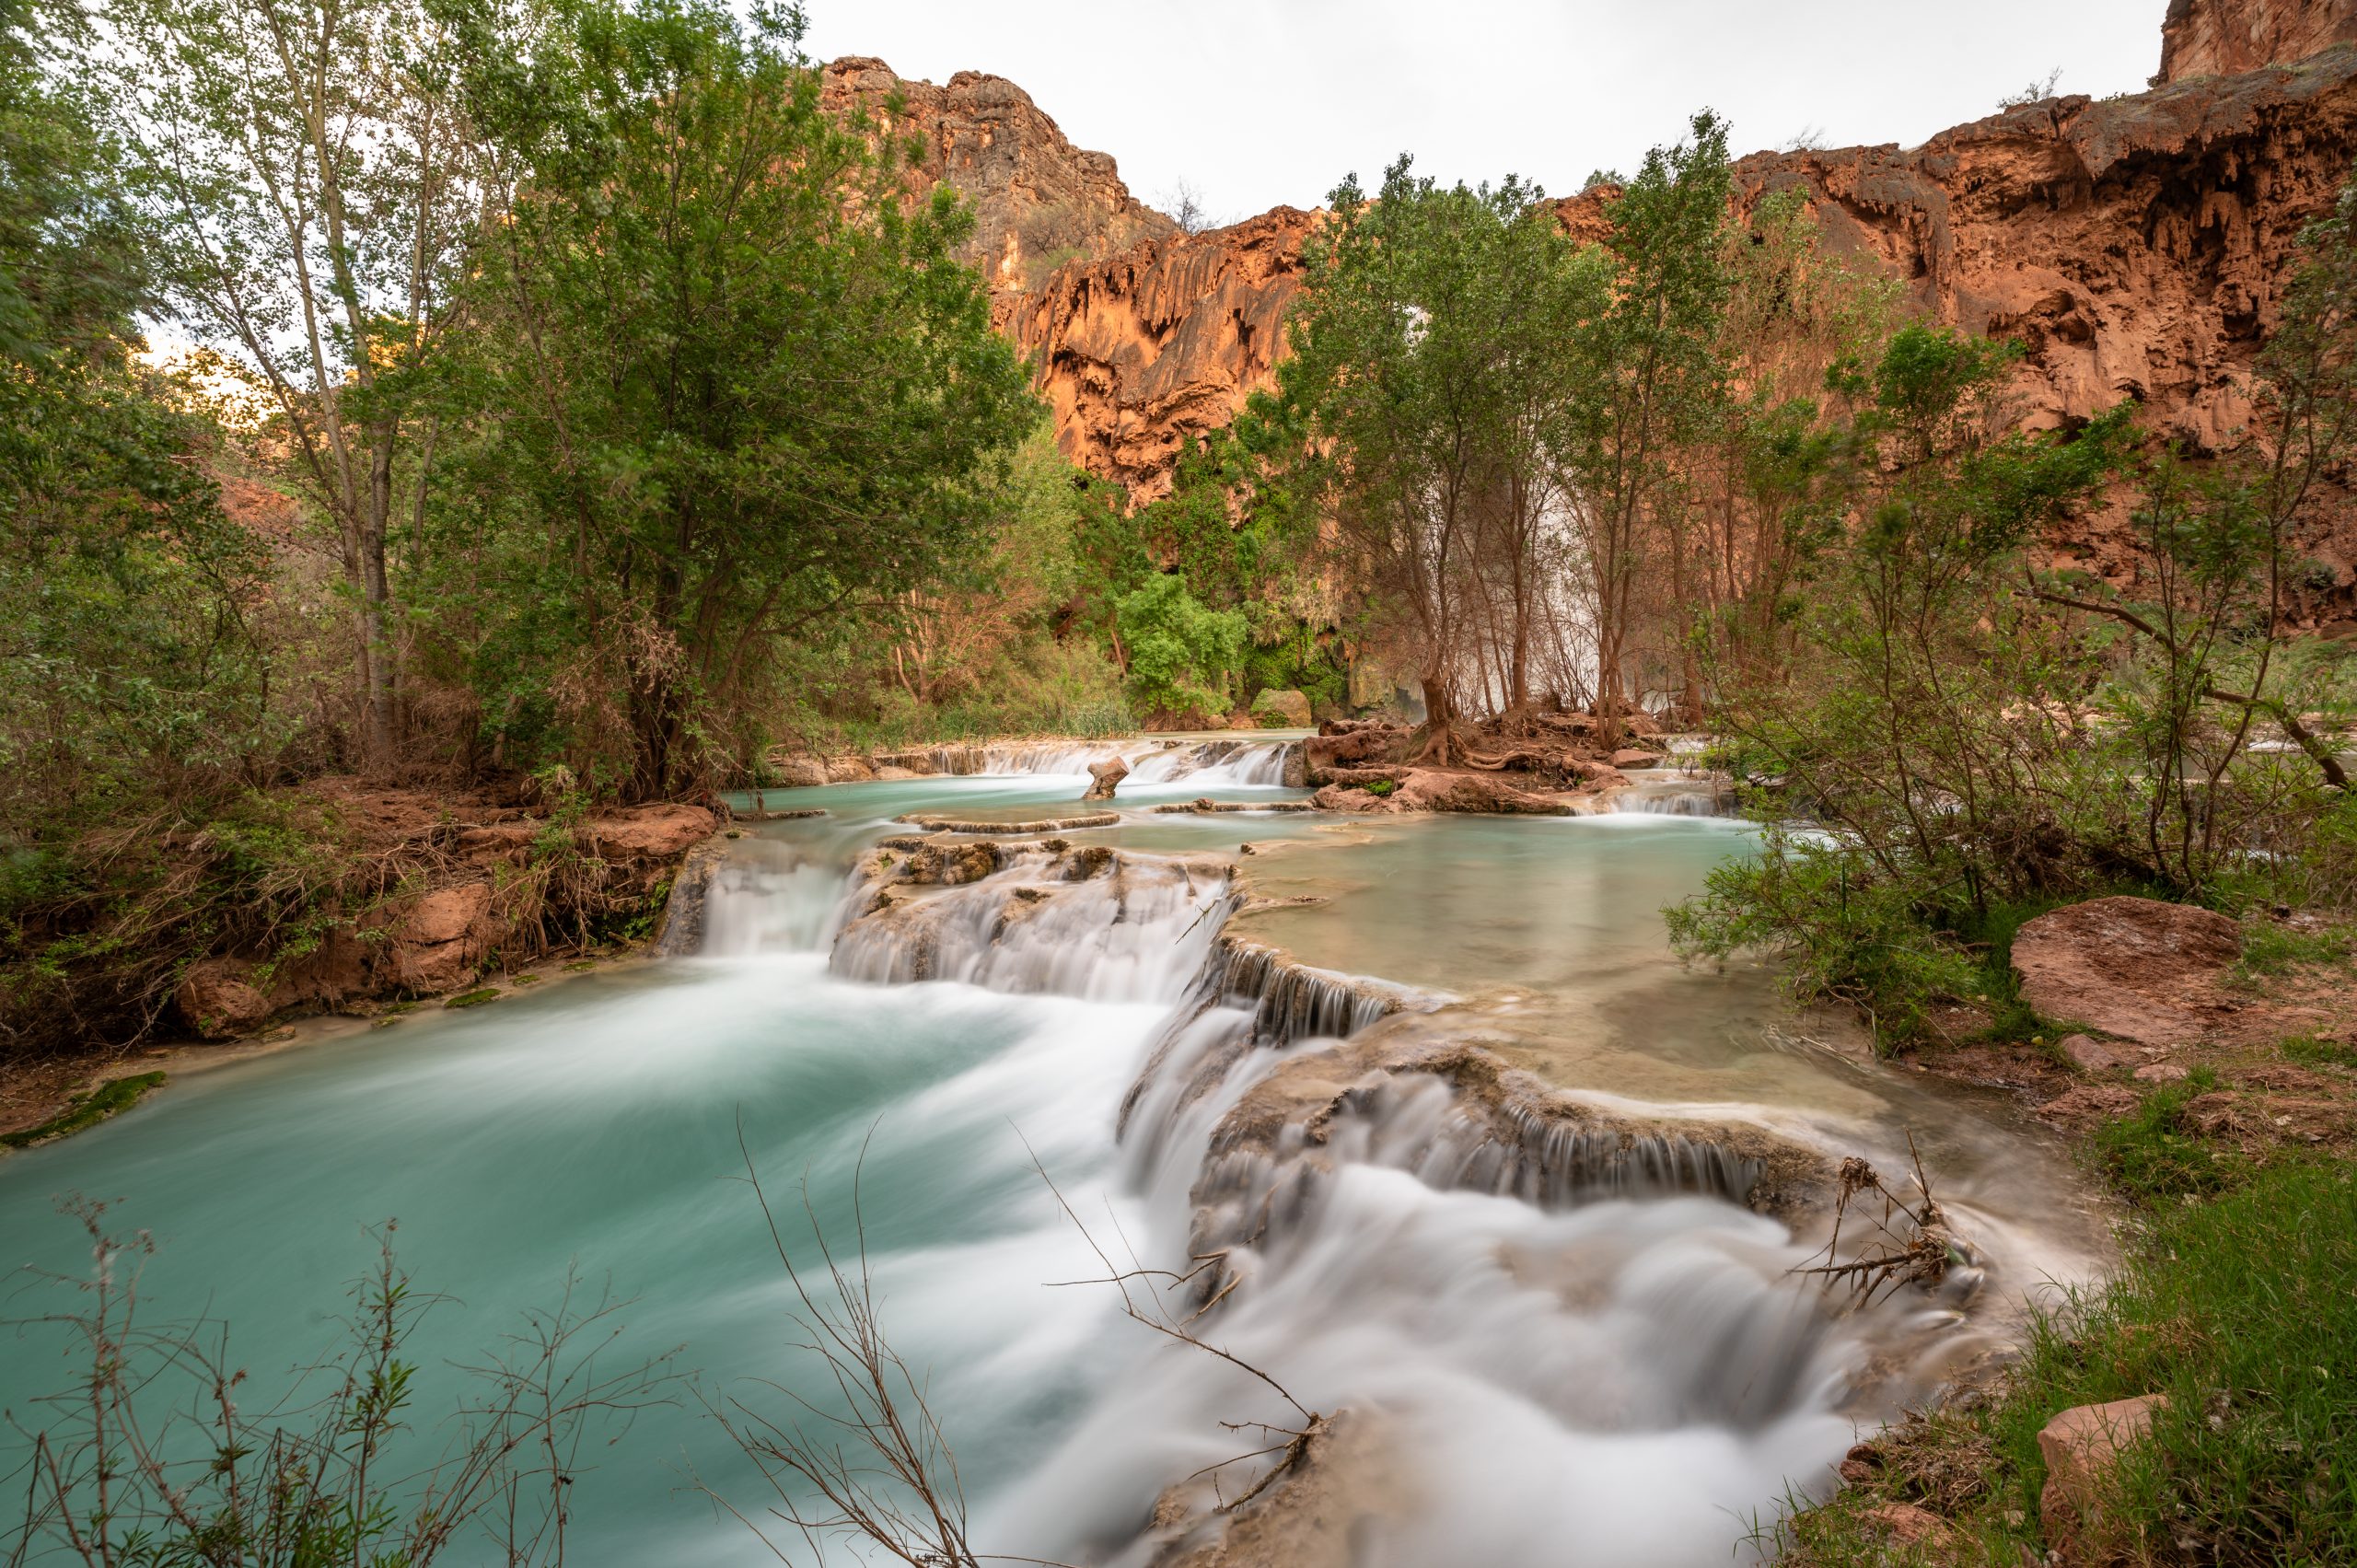
Rise early and drive to the trailhead — be careful of the cattle and elk. From the trailhead, it’s 8 miles to Supai village. Supai village has a cafe where we stopped for frybread before making the final 2-mile descent to the campgrounds. With a roughly 2400-foot elevation change, it typically takes 4 to 6 hours, depending on various factors such as level of fitness, the weight of the pack, and weather conditions. The first section is a descent through switchbacks (the most challenging part is hiking the switchbacks back up), but once you’re past the switchbacks, the trail is relatively flat and easy to follow. Upon arrival, set up camp and explore the campground and nearby creek.
Day 2
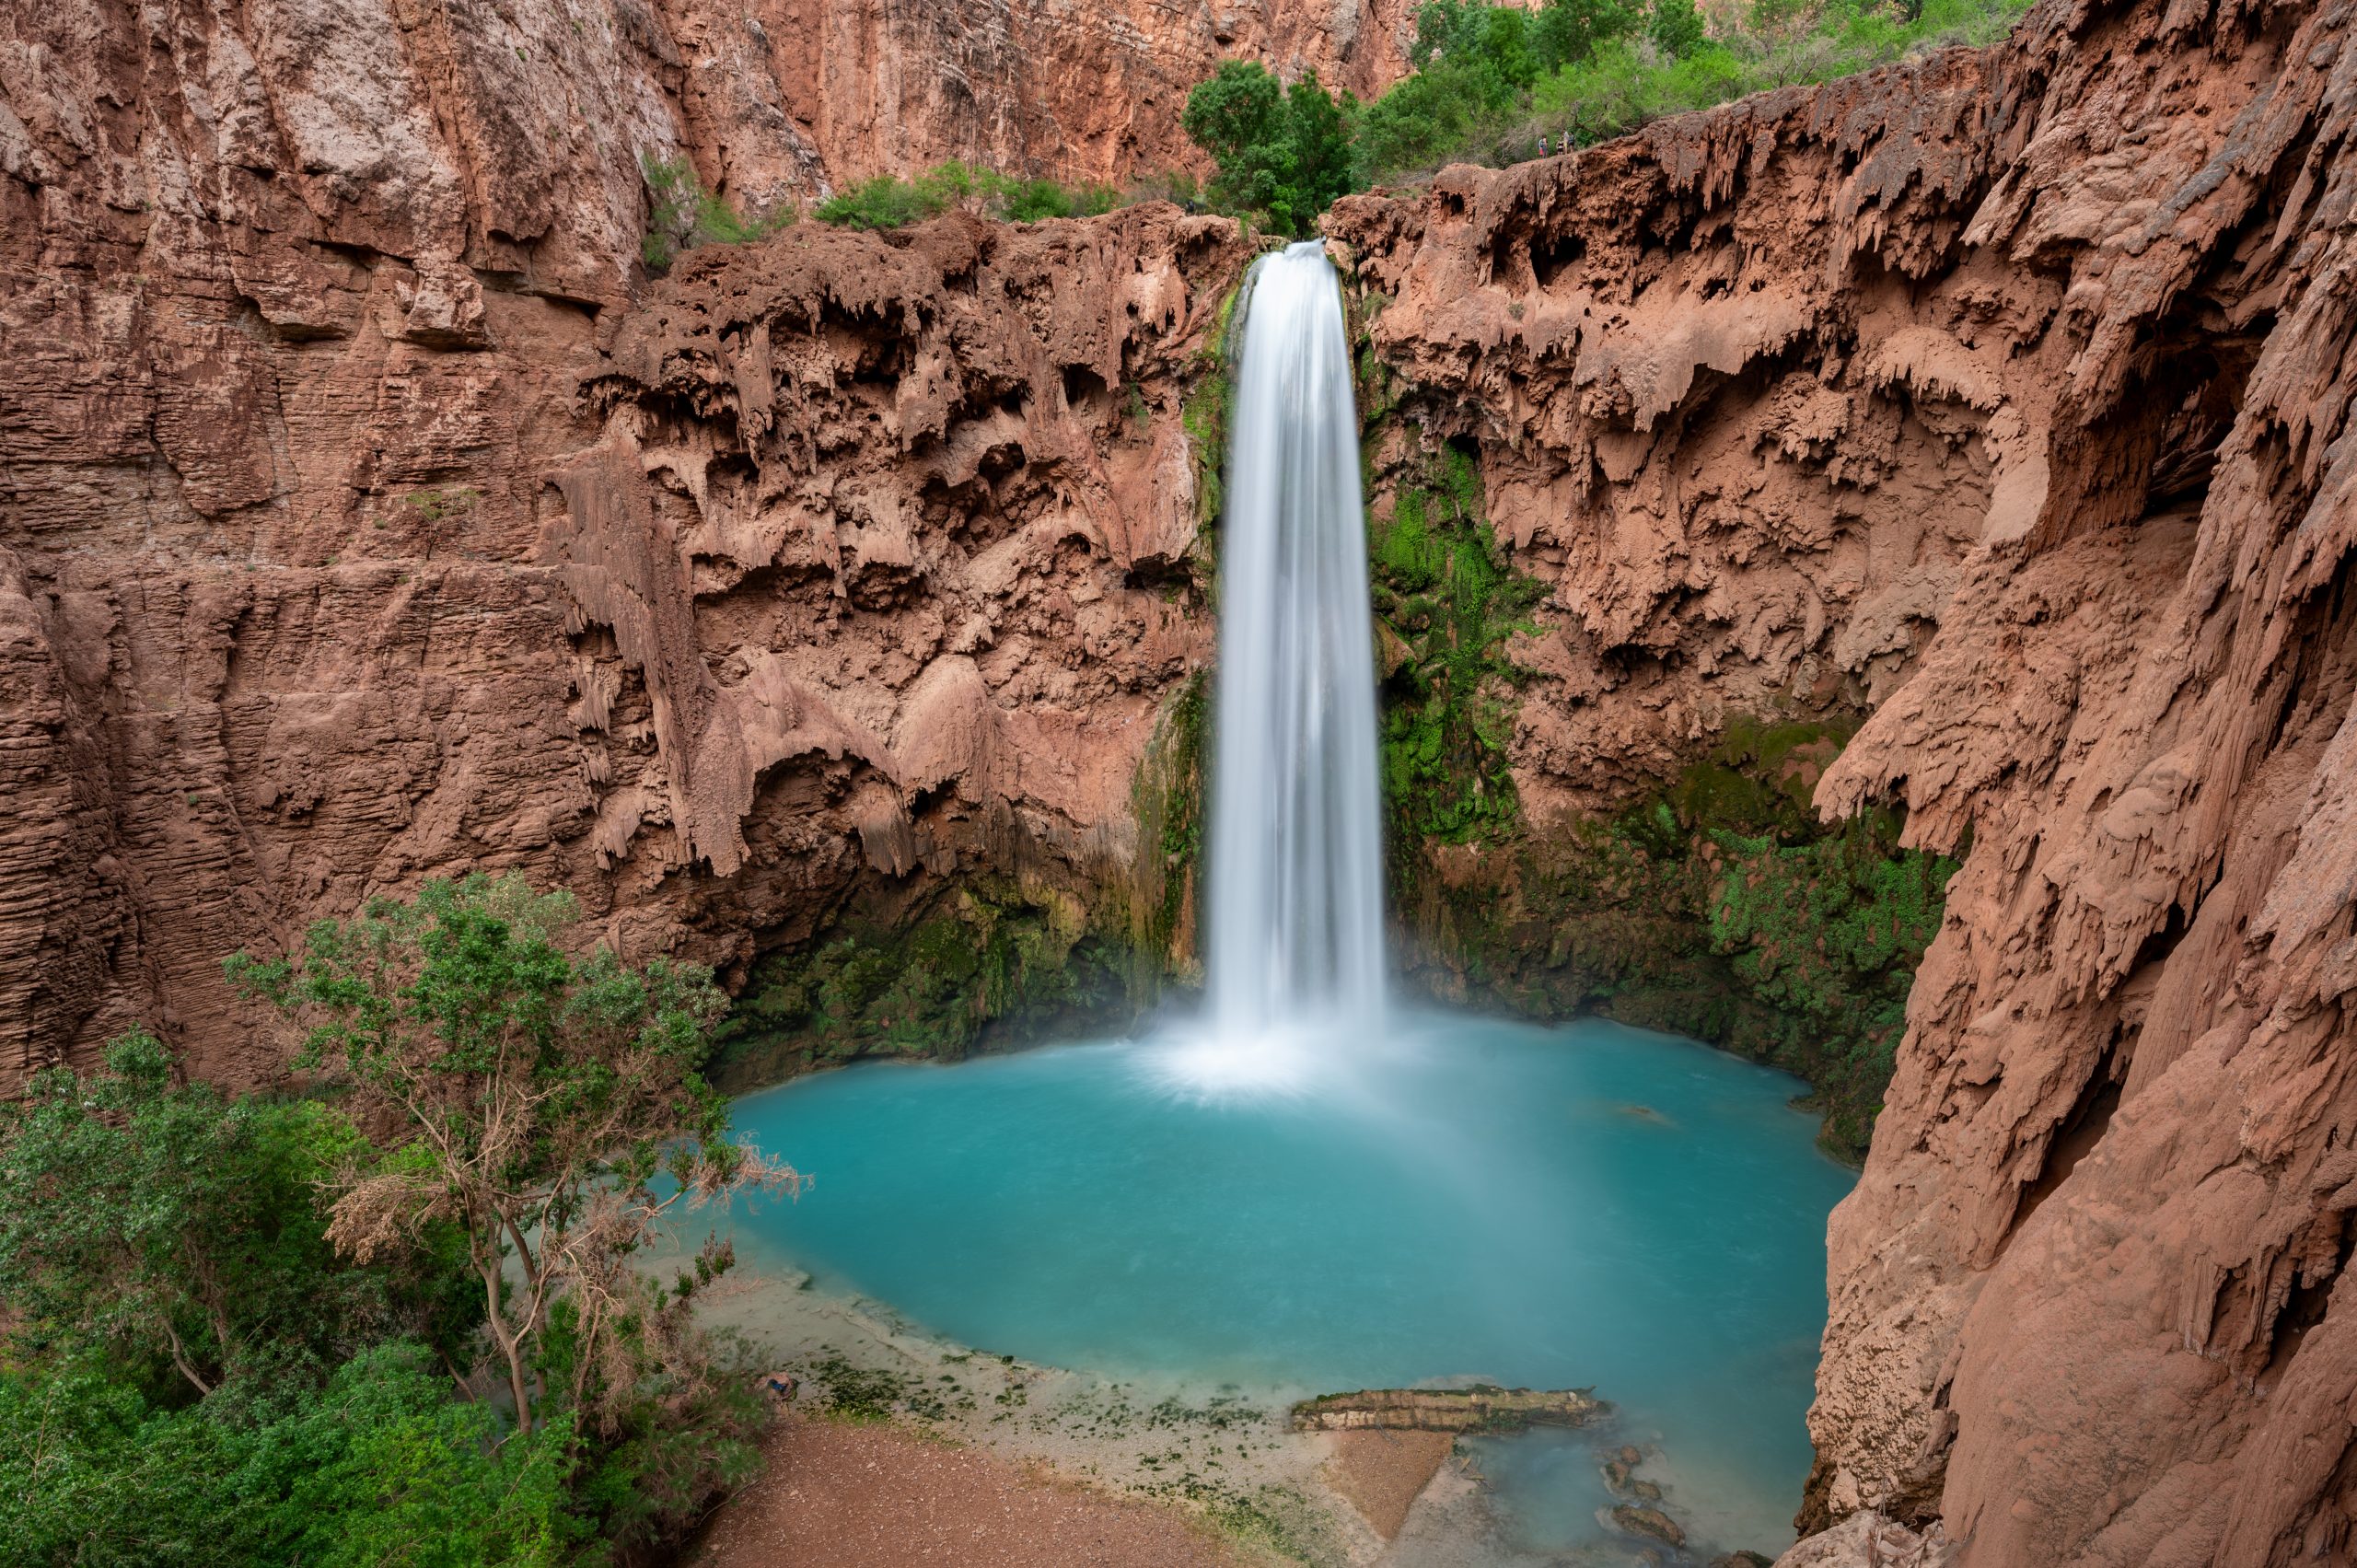
Day 2 is good for the lower waterfalls — Havasu, Mooney (about 1 mile from campground), and Beaver (roughly 6 miles round trip). If you’re feeling adventurous, some people hike to the Confluence, a 16-mile round-trip trek. Don’t forget to bring a daypack and wear sturdy footwear (some areas are slippery and steep). There may be stream crossings, so pack water shoes if you wear hiking boots.
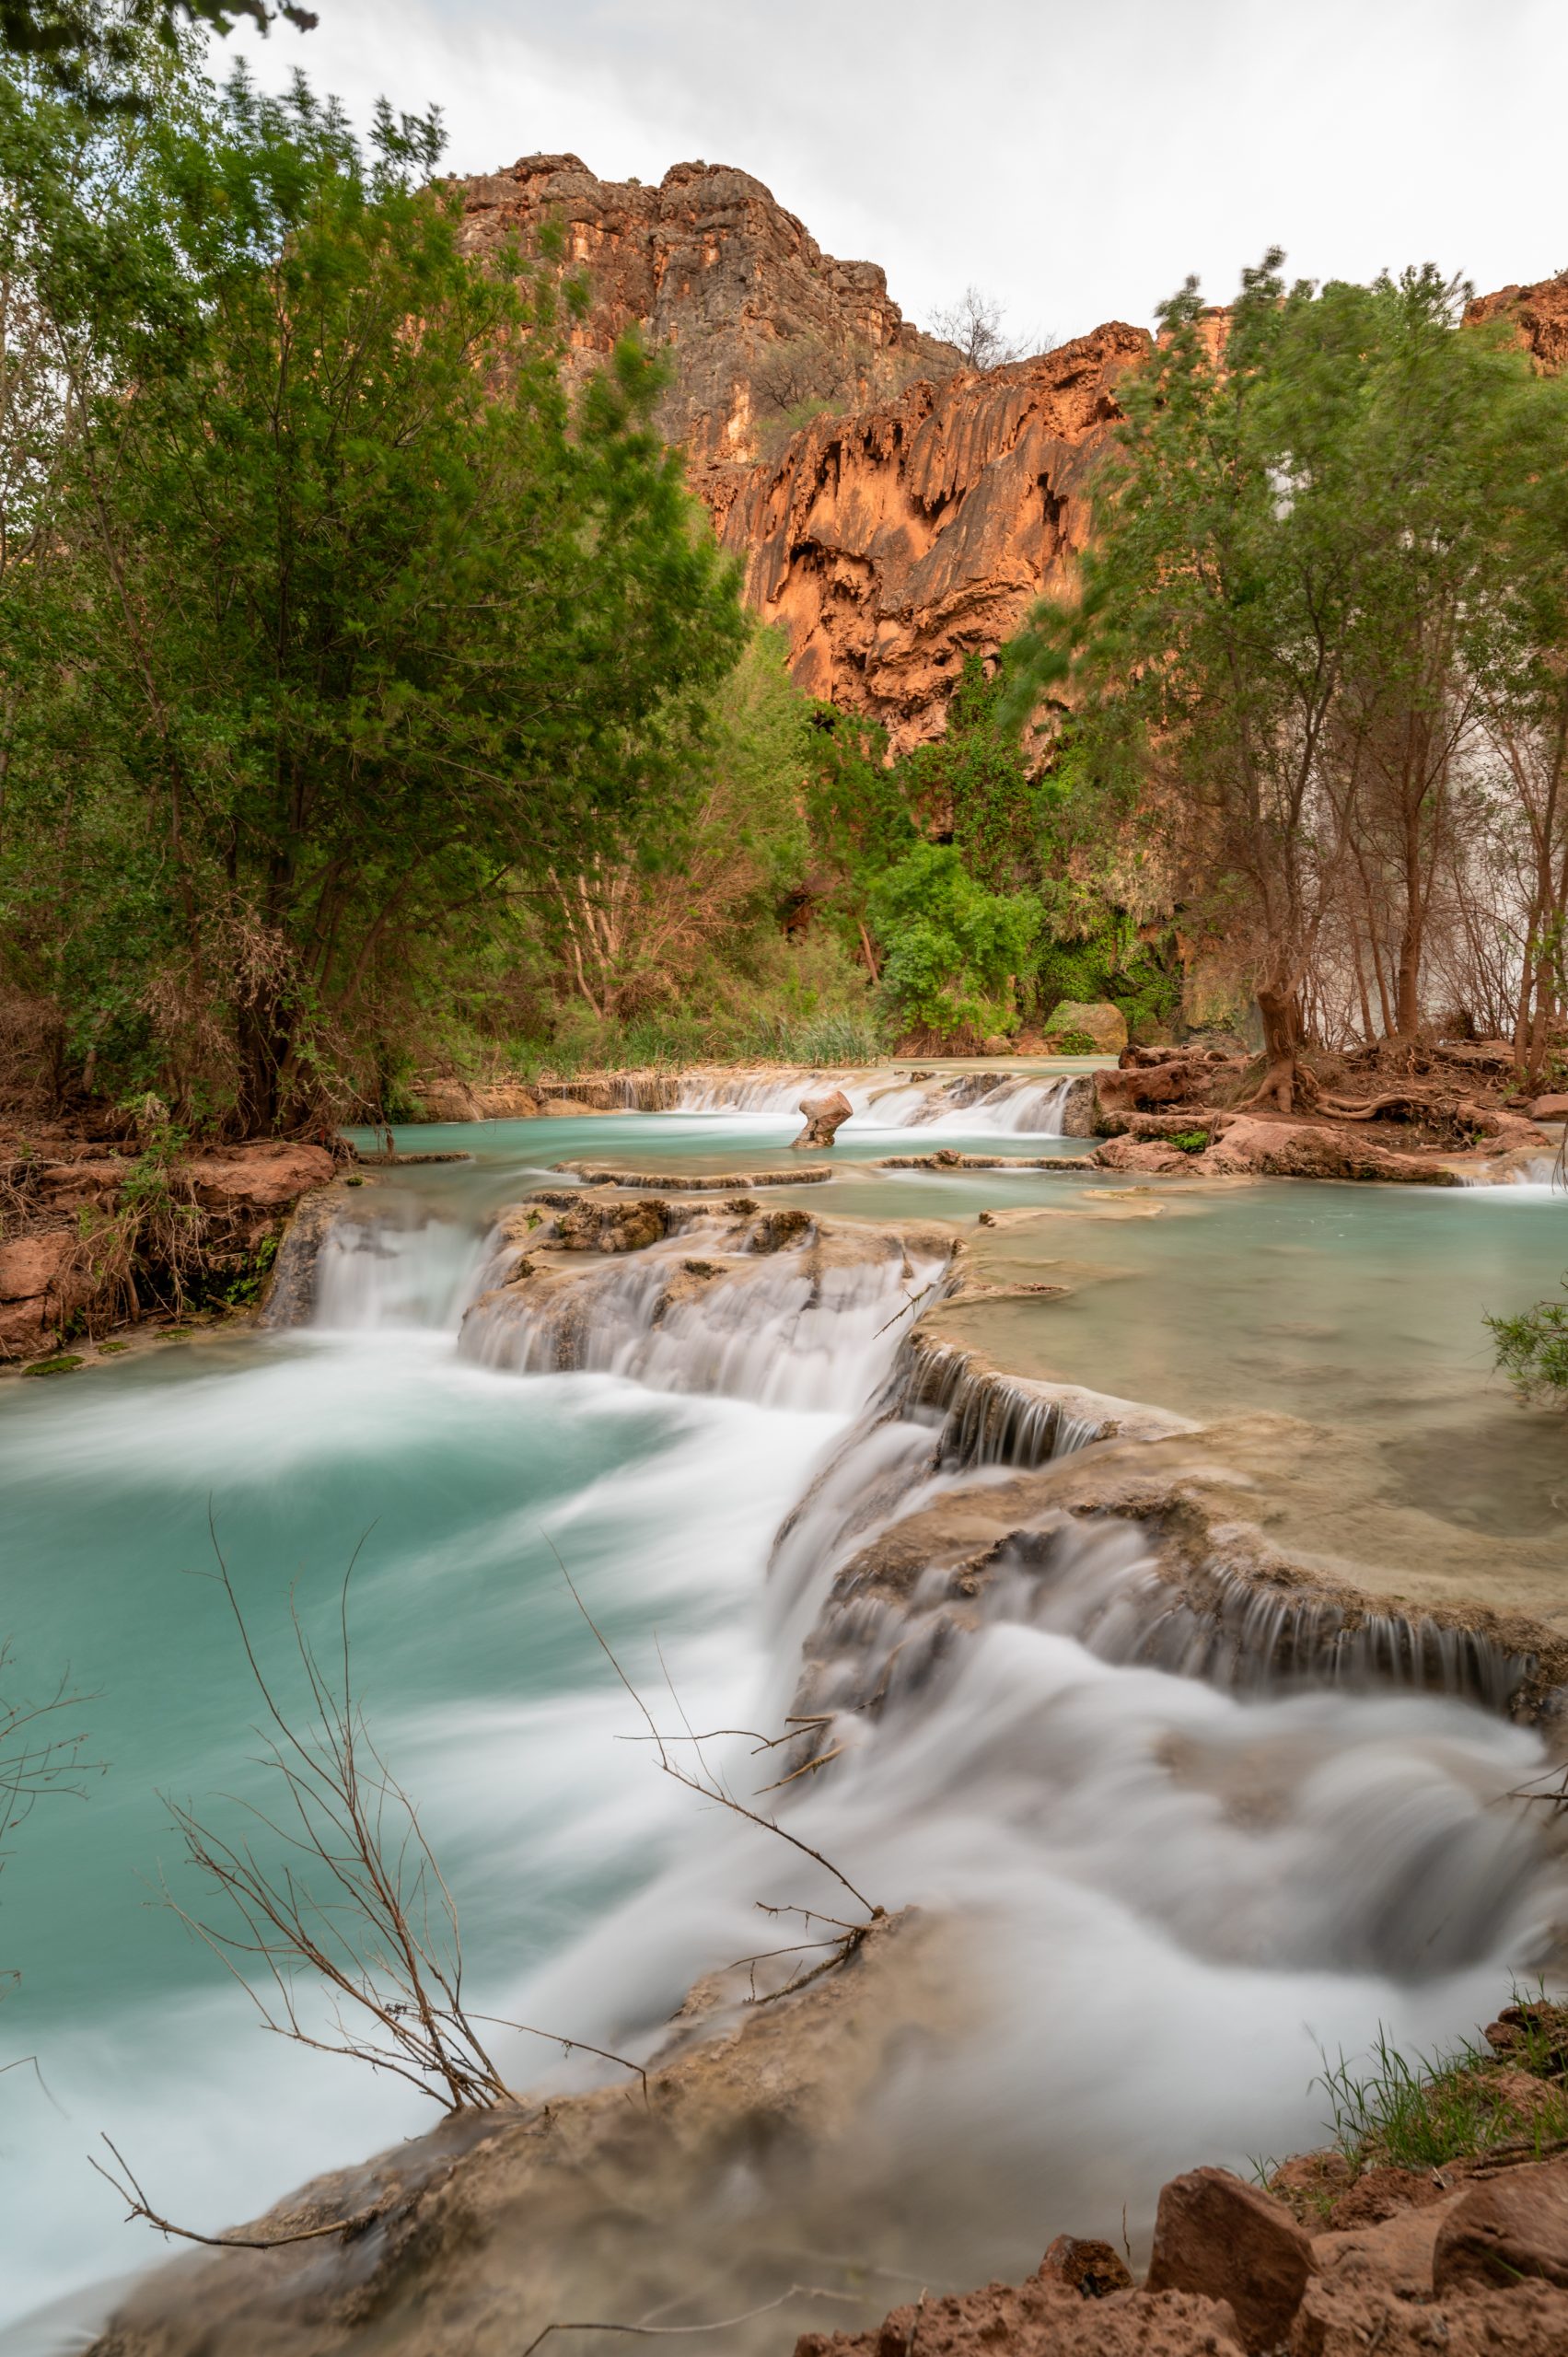
Hiking Mooney Falls involves chains and ladders, which can seem daunting. You can pack gloves to help better grip the chains. When we were there, there was a pile of gloves left that you could use if you forgot your own. If you’re afraid of heights, I suggest skipping this or going when it’s quieter so you can take your time. Since there’s only one way to Mooney Falls, try not to hold up traffic and annoy everyone behind you.
Day 3
Explore the upper waterfalls — Fifty Foot and Little Navajo. These can be tricky to find, and we got lost a couple of times. I highly recommend downloading the AllTrails app ahead of time to help navigate. Grab some frybread from the hut at the top of Havasu Falls on your way back to the campground if you didn’t get a chance to try it back in Supai village. Call it an early evening if you plan to hike early the following morning.
Day 4
If you don’t start early, there’s little shade, so we woke up at 3 am, packed our gear in the dark using our headlamps, and began our hike. Remember that hiking out with the uphill switchbacks takes a bit longer. Another option to reduce your overall hiking mileage is to helicopter out of the canyon. It’s $85 for a one-way flight per person. Please note that they don’t run every day, and it’s on a first-come, first-serve basis.
Havasupai Camping Guide

- Campsites are on a first-come, first-serve basis. If you don’t get your ideal campsite, don’t fret because people may leave while you’re still there, and you can snag their spot before the new campers arrive. Note that there is only one water spigot at the campground’s entrance, so consider that when selecting a campsite.
- There are composting toilets throughout the campground. However, they run out of toilet paper, so it may be worthwhile to pack your own.
- No alcohol, drones, or campfires allowed.
- Follow the leave-no-trace principle. Be sure to pack out everything that you brought, including trash. Visit responsibly so others can visit this beautiful, magical place.
- Be aware of critters. Keep food in odor-proof sacks inside a ratsack and suspend it from a tree with a utility cord and a carabiner.
Photography Tips
Hiking Havasupai is a photographer’s dream. My talented husband took every photo in this guide, and he shared some tips on capturing the best waterfall pictures.
- Bring a professional camera — Brett used this exact one. If that isn’t an option, an iPhone will still work.
- Learn how to take long exposure shots; this gives the silky effect of the water flowing in all my images. Brett said 0.5-1 second worked best for him, but try experimenting for different results.
- Use a tripod, which will help prevent motion blur for long-exposure shots.
- Consider bringing a wide-angle lens. Brett brought his wide-angle lens to shoot the waterfalls because they’re taller and more challenging to fit into the frame.
- Brett strongly recommends using filters. The ND filters decrease the light entering the camera sensor during long exposures (recommend at least a three or 6-stop filter). Meanwhile, the polarizing filter helps reduce reflected light and improves colors.
Havasupai was worth the three-year postponement and truly a bucket list experience! If you’re headed to Havasupai, I hope you found this guide helpful. If you have any questions, please leave them in the comments, and I’ll do my best to answer. xo
Such a detailed post, Kelly!
Absolutely loved it.
Thanks for sharing 🙂
Great post! I really appreciated how you explained photography tips! I have always wondered how to get a great shot (aka use my camera). This is helpful!
I love this post! And I really really need to learn how to take long exposure photos – looks really good!
This is a very thorough post with lovely photos. It makes me want to add Havasupai to my bucket list.
Your pictures are stunning; with the low shutter, you make the water look like that. Make me wanna travel so bad!
Oh my gosh those waterfalls look incredible! I would love to go here!
This is a great guide with wonderful details on how to successfully navigate this trip. I also love your photos! They are beautiful! Thanks for sharing!
Wow, those waterfalls look incredible! I would love to go there!
Very beautiful! Looks like it would be an amazing place to visit. Thank you for sharing!
Your photos are stunning! And thanks for the heads up about the drone policy
Okay, first of all, your photos are absolutely gorgeous! I am so jealous, it makes me want to go there.
I also love your packing list. What a great way to prepare for such a fun trip. Thanks for all the great tips!
Love all the photos! Great blog!!
I want to visit Havasupai someday…
https://jeanneselep.blogspot.com/2024/02/dreaming-of-summer.html
Wow, the views are absolutely amazing! It’s too bad that it’s so far away 🙁 However, I will definitely use your photography tips.
Very practical information. Good stuff!
The photography tips were very useful. I am a beginner and it will help me.
I always enjoy your blog you always take such gorgeous photos. Thanks for the share.
This is definitely a backpacking trip on my adventure bucket list. Thanks for the awesome tips!
Wow I didn’t know it was such a long and expensive excursion!!!! I swore I’ve known people who went in a day there and back to the falls but maybe that’s only part of it ?
Like you, hiking to Havasupai is on my bucket list! It sounds like such an incredible experience!! Definitely a little jealous you got to do it haha. This is an excellent guide though! I’m glad you broke down each individual day, very helpful.
Wow! I never knew a place like this existed. The pictures are really good, I would love to go to a place like this!
Wowwww – this places looks stunning!
Thanks for sharing about Havasupai and the best times to visit! It’s intriguing how the weather plays into the experience, and finding that perfect balance between comfortable hiking and swim-friendly water seems like a personal adventure. Appreciate the insight!
So lucky! This is on my bucket list for sure! I’m moving to Arizona next year, so not getting into the permit pool until then, since I’ll be (sort of) a local and can do the hike anytime!
Havasupai has been on my bucket list way before it became so popular as it is today. However, I’ve never made it out there. One day though. One day.